 ( 26 ) 1-Feb-2013
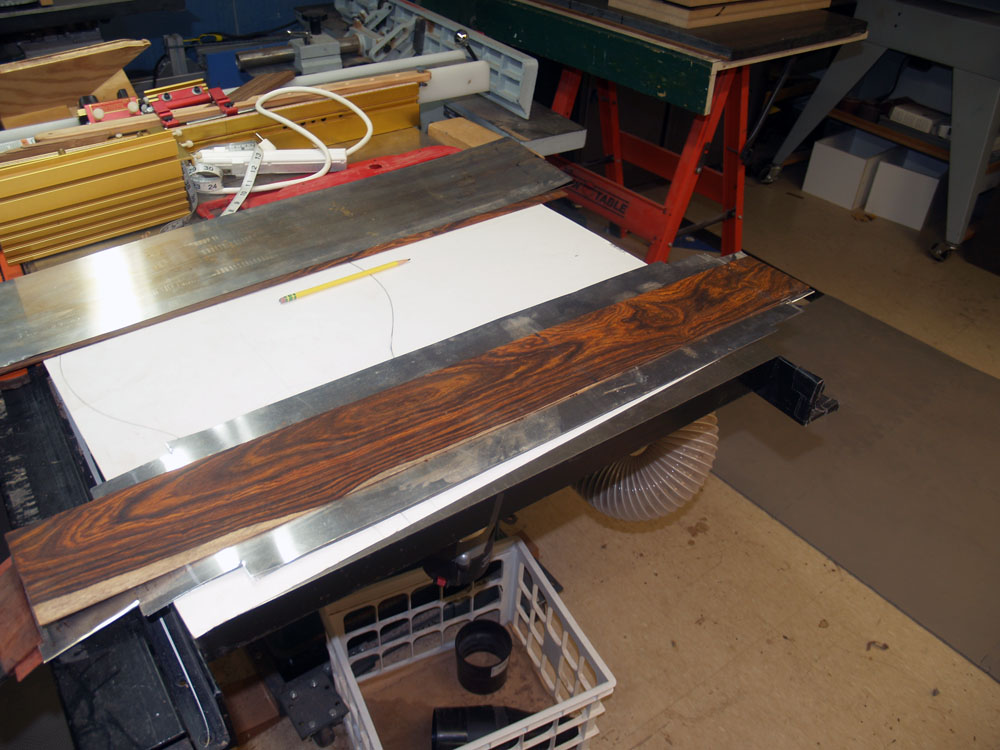
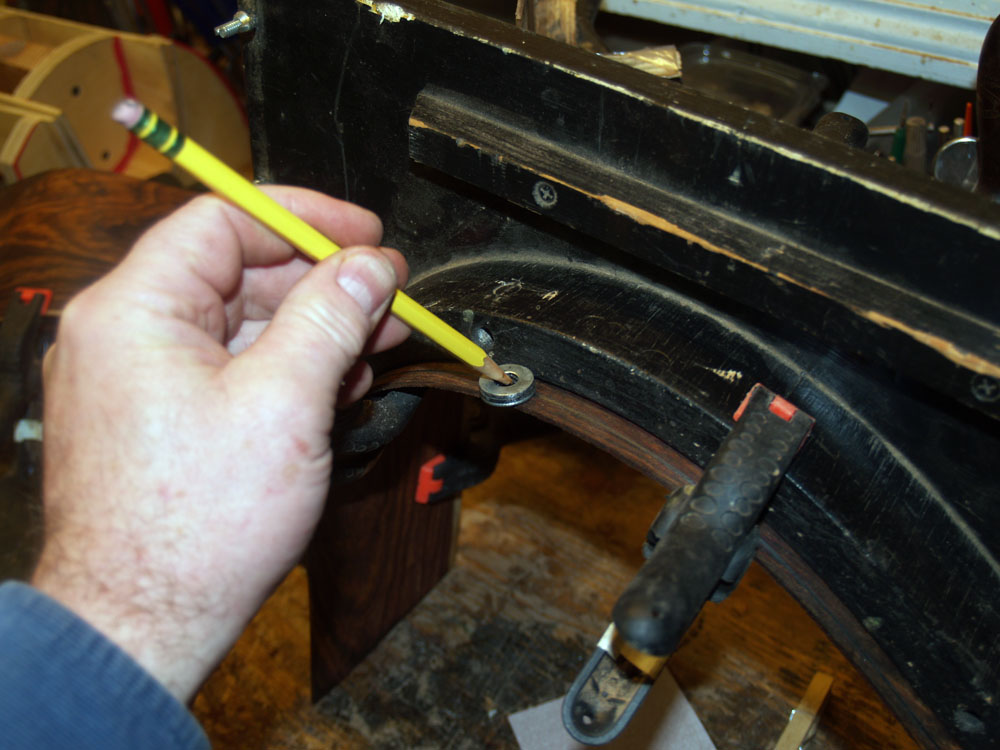
Here I am laying out the sides in the heating blanket assembly I will use to bend the sides.
Cocobolo Body 15 inch lower bout
Adirondack Spruce Top
Lion Theme Marquetry
Mahogany Neck
Ebony Fretboard
Gold Frets & Gotoh Tuners
Padauk
Binding
25.4 Inch Scale Length
( 26 ) 1-Feb-2013
Here I am laying out the sides in the heating blanket assembly I will use to bend the sides.
 ( 27 ) 1-Feb-2013
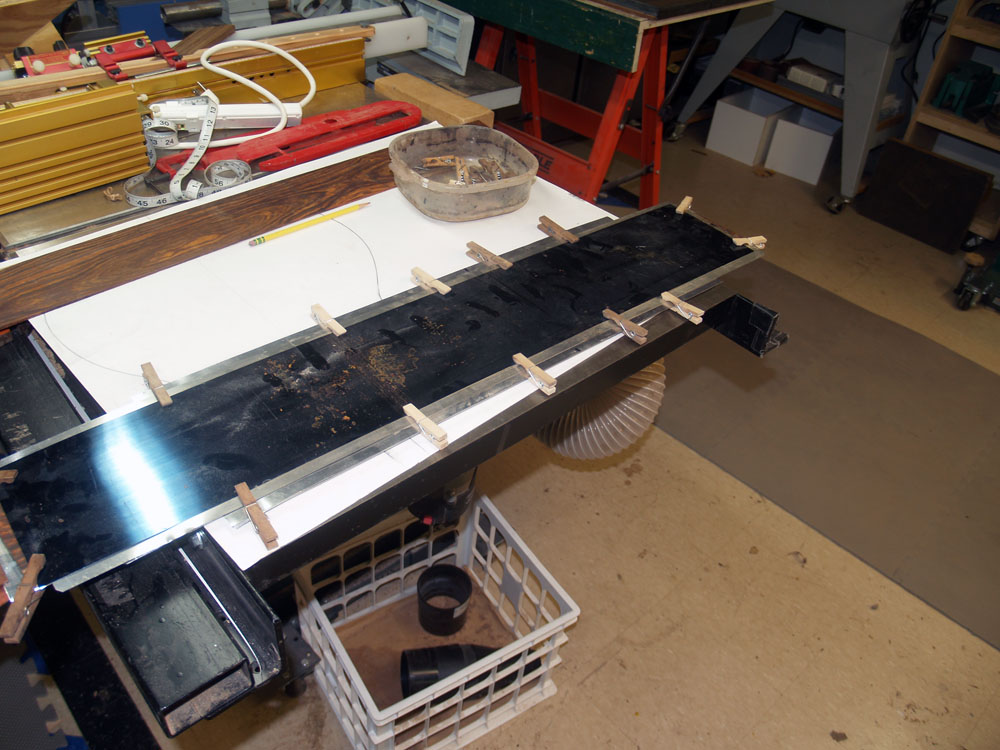
This assembly is made up of a heating element between two sheets of aluminum flashing, the piece of wood to bend, followed by another piece of flashing, and then a sheet of spring steel.
 ( 28 ) 1-Feb-2013
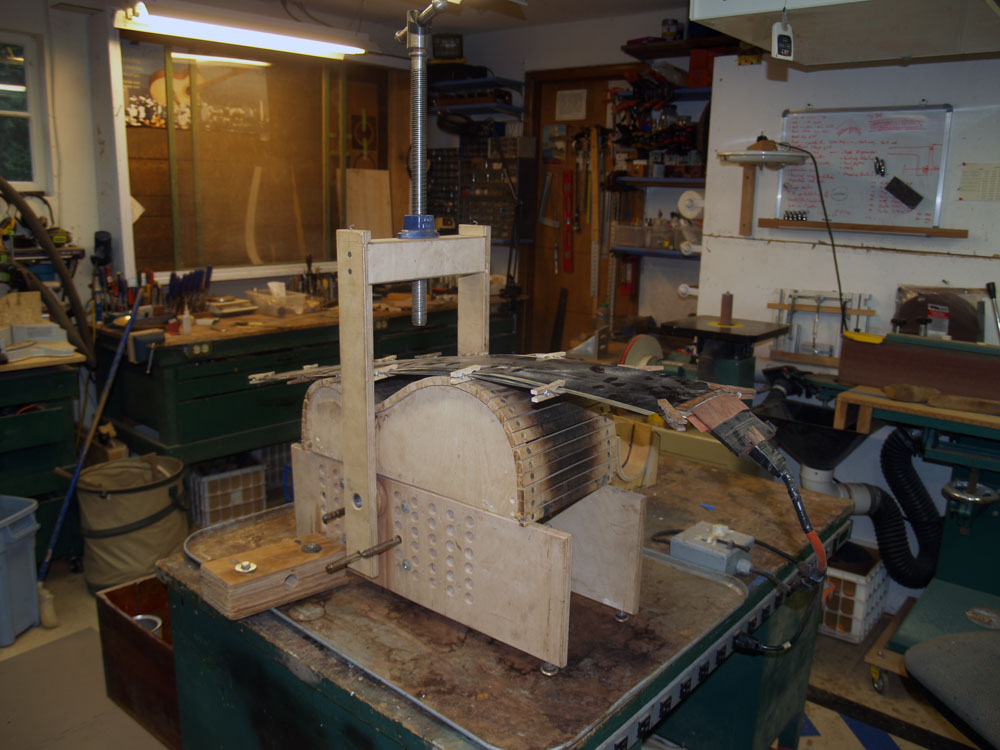
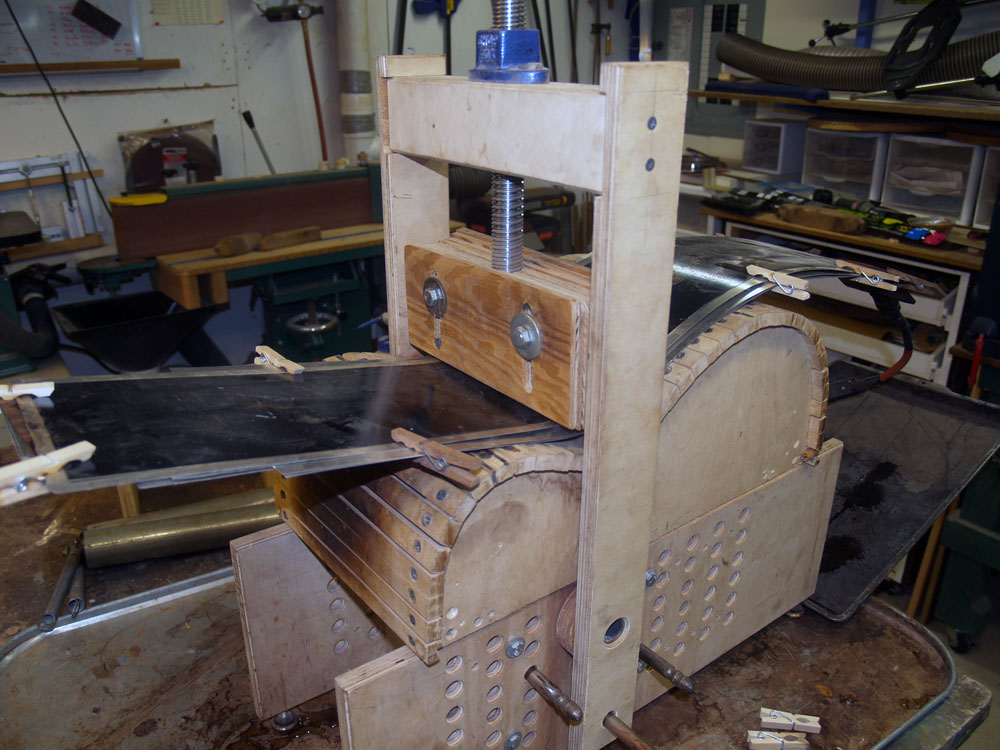
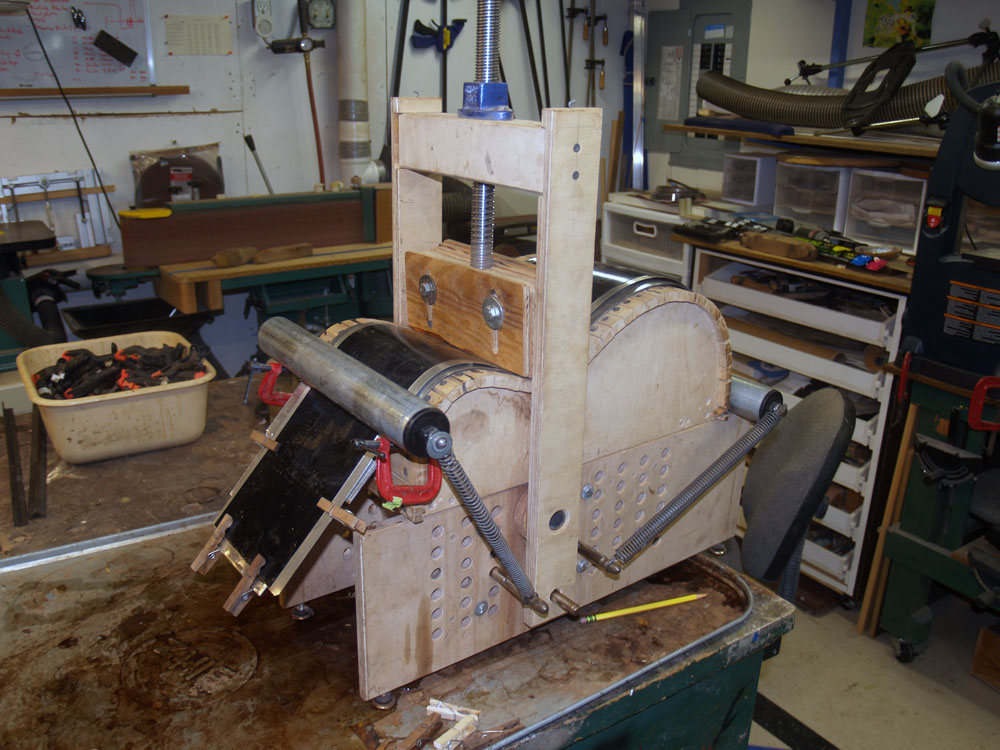
The assembly gets positioned in the bending machine seen here.
 ( 29 ) 1-Feb-2013
While the wood is heating up I squirt a bit of water between the sheets of flashing. When wood gets hot it becomes quite flexible. The water helps to conduct the heat and prevents the wood from scorching. It also seems to act as an intercellular lubricant. Finally the spring steel prevents the wood from over bending and cracking.
 ( 30 ) 1-Feb-2013
After the wood had cooked for a while and become flexible I first press the waist into place.
 ( 31 ) 1-Feb-2013
 ( 32 ) 1-Feb-2013
I then attach the lower bout roller.
 ( 33 ) 1-Feb-2013
And roll the lower bout into shape.
 ( 34 ) 1-Feb-2013
Next I attach the upper bout roller.
 ( 35 ) 1-Feb-2013
And complete the bend.
 ( 36 ) 1-Feb-2013
With the wood bent, I remove the rollers and loosen the waist shoe.
 ( 37 ) 1-Feb-2013
I slide the spring steel out of the assembly. After pressing the wood back into shape I continue to cook the wood on a reduced heat until it is dry and holds it shape.
 ( 38 ) 1-Feb-2013
After about an hour or so the side will hold its shape.
 ( 39 ) 1-Feb-2013
I place it in the side form until I am ready for the next step.
 ( 40 ) 1-Feb-2013
The same process is used for the cutaway side, except I don't complete the upper bout bend. I stop at the point of the cutaway break.
 ( 41 ) 1-Feb-2013
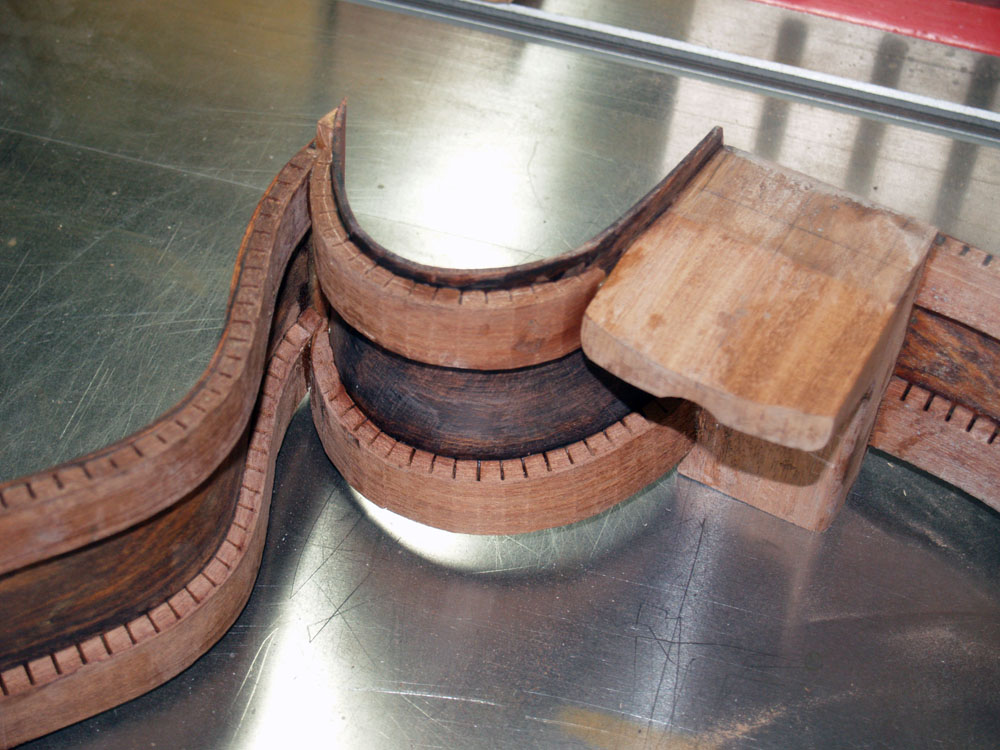
A funny shaped piece of wood.
 ( 42 ) 1-Feb-2013
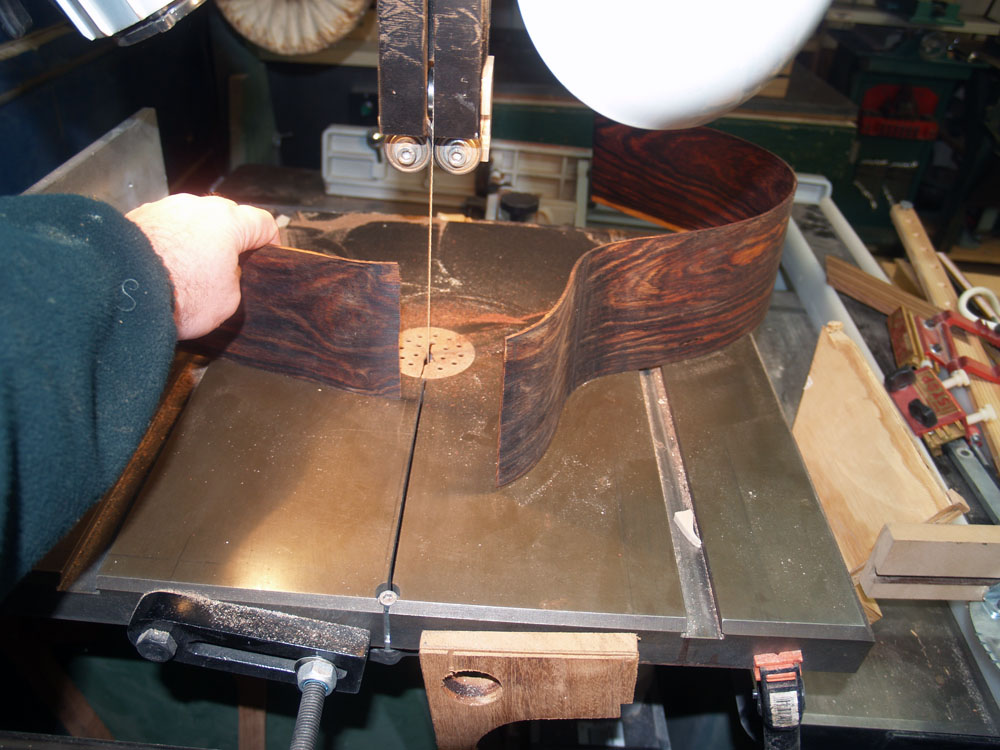
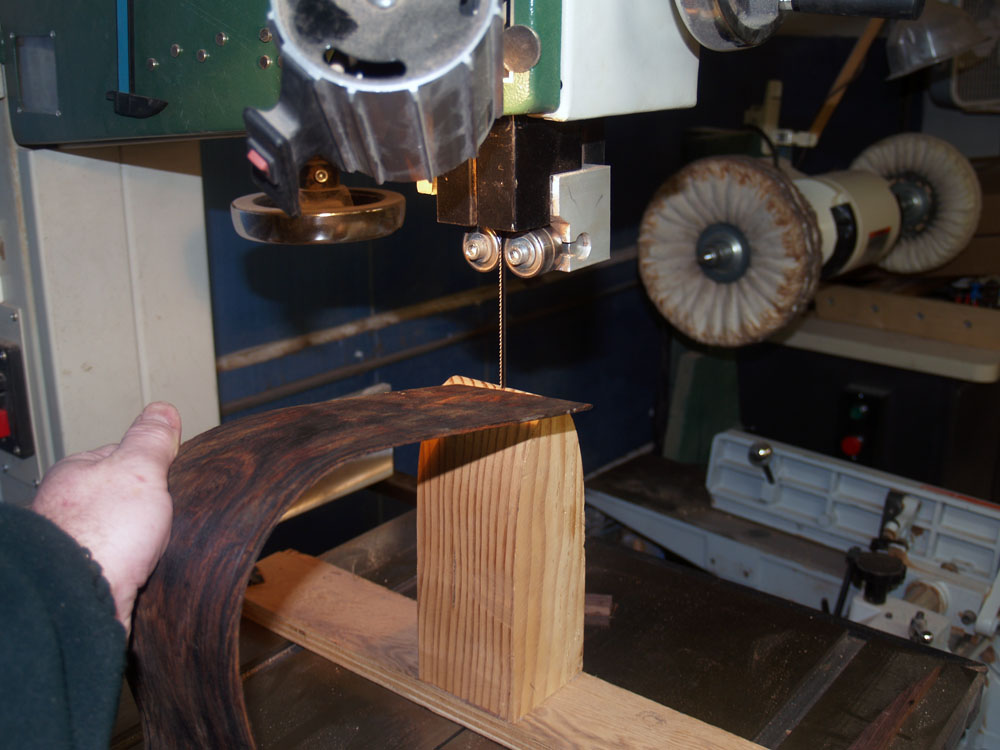
Now, here is a scary step. I cut this very nice piece of wood at the break point of the cutaway. I spend a lot of time making sure this is the right spot... measure once, twice, thrice, and then cut.
 ( 43 ) 1-Feb-2013
I use the bending machine again with a special cutaway form to bend the cutaway section into its preliminary shape.
 ( 44 ) 1-Feb-2013
 ( 45 ) 1-Feb-2013
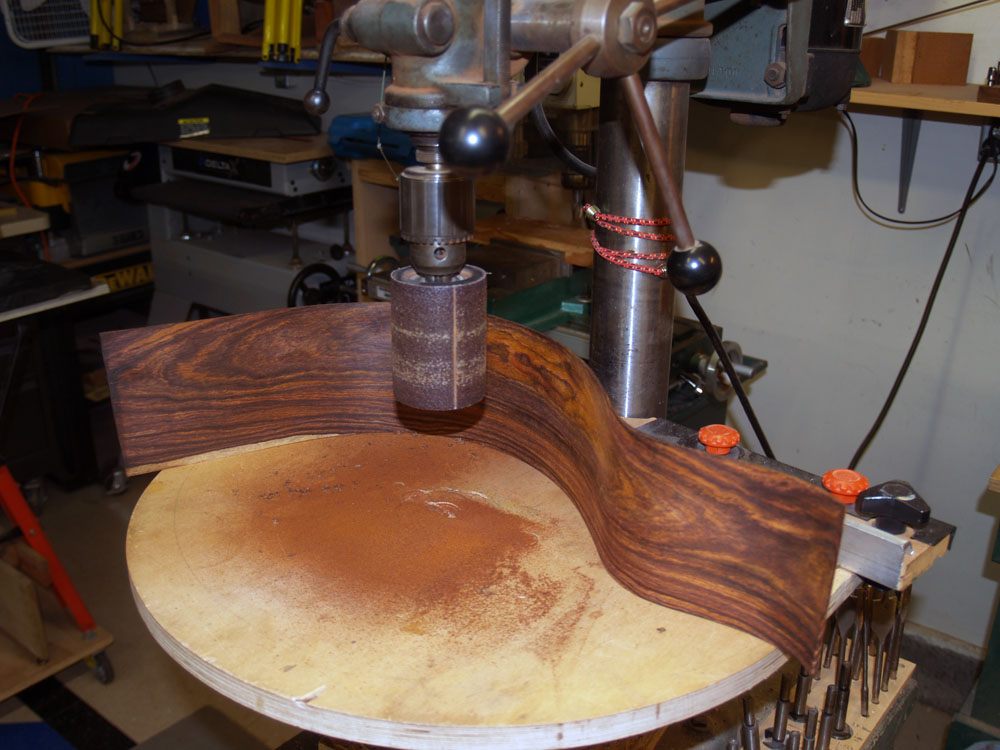
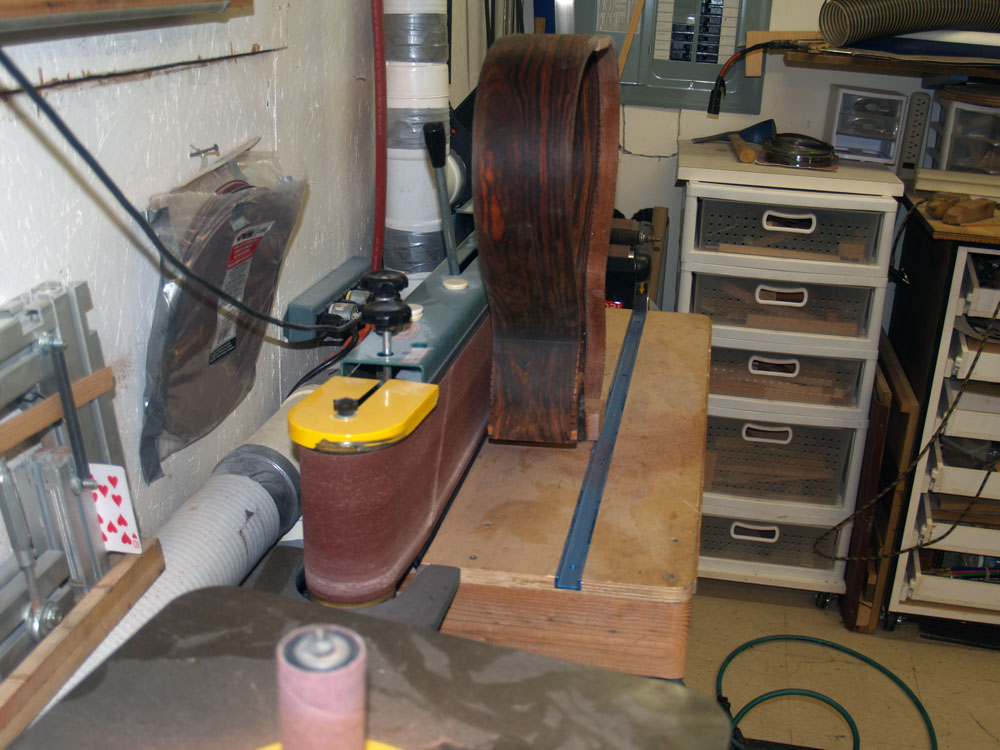
Before going any further I clean up the interior side of the wood. I love the grain patterns of Cocobolo.
 ( 46 ) 1-Feb-2013
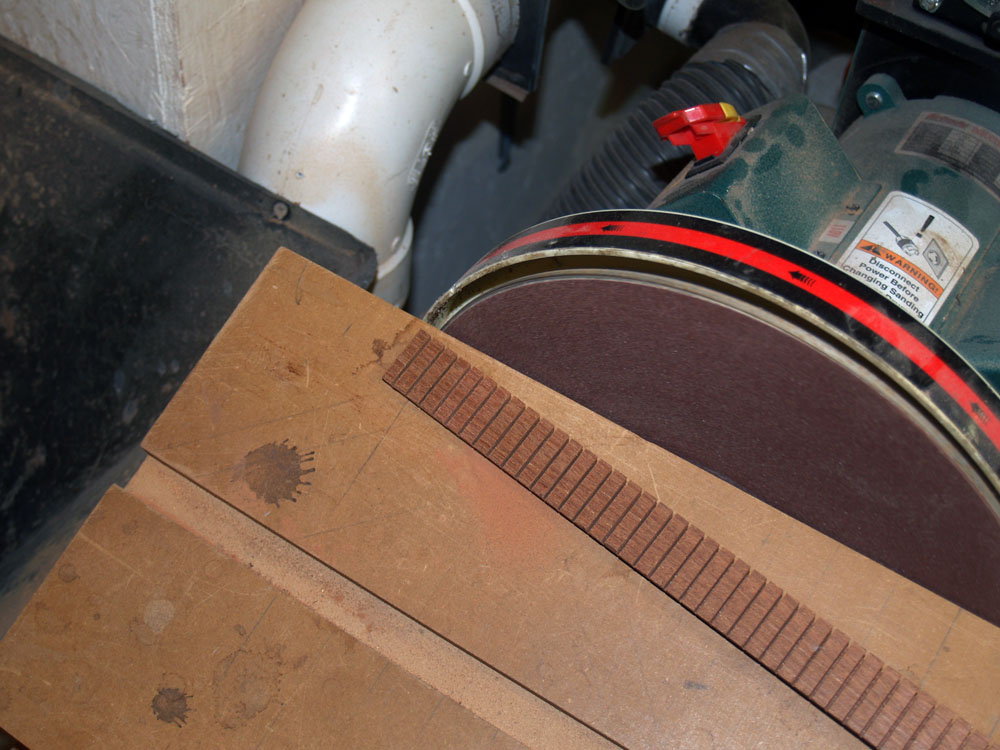
In this picture I am putting a bevel on the kerfing.
 ( 47 ) 1-Feb-2013
The bevel serves no useful purpose other than to make it look good.
 ( 48 ) 1-Feb-2013
I the use the bending machine to bend the kerfing into shape.
 ( 49 ) 1-Feb-2013
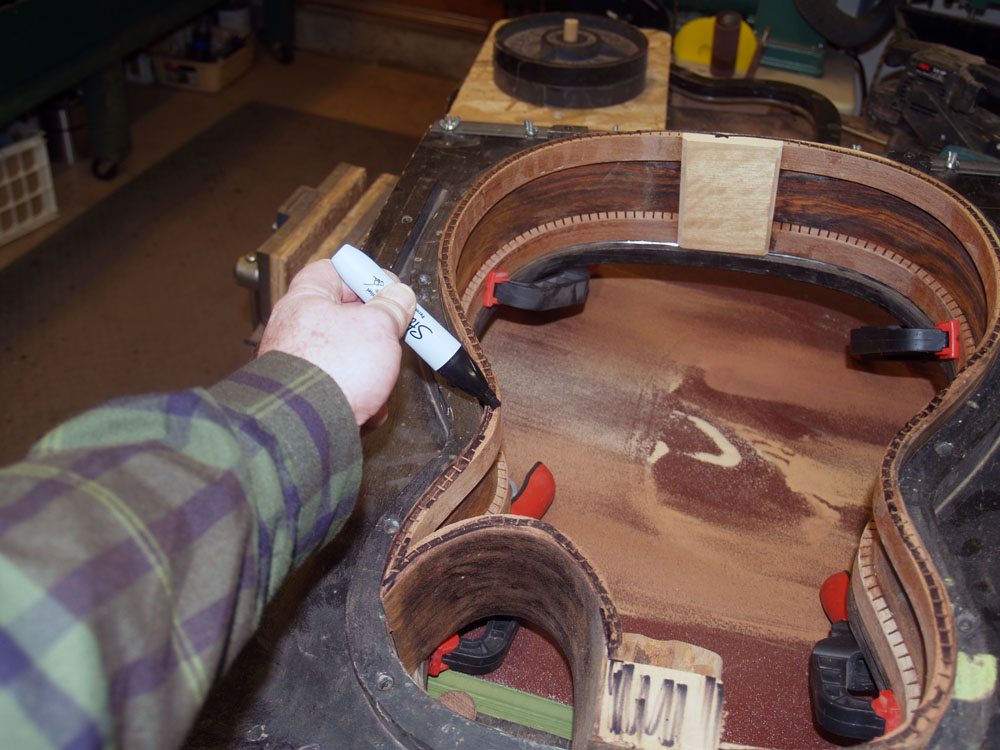
With the sides in their forms I mark their final shape.
 ( 50 ) 1-Feb-2013
Then using my very nice bandsaw I cut out the sides. I built this tall platten to help support sides as I cut them.
 ( 51 ) 1-Feb-2013
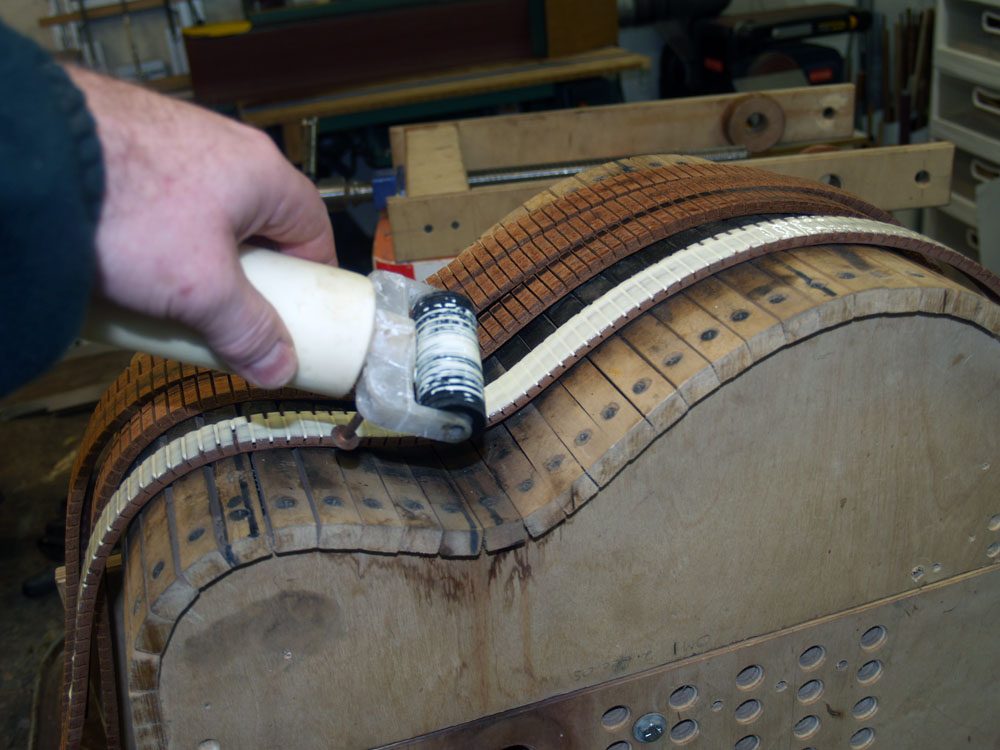
In this picture I am applying a liberal (well actually a progressive) amount of glue to the kerfing.
 ( 52 ) 1-Feb-2013
And then I position the kerfing on the side in the form.
 ( 53 ) 1-Feb-2013
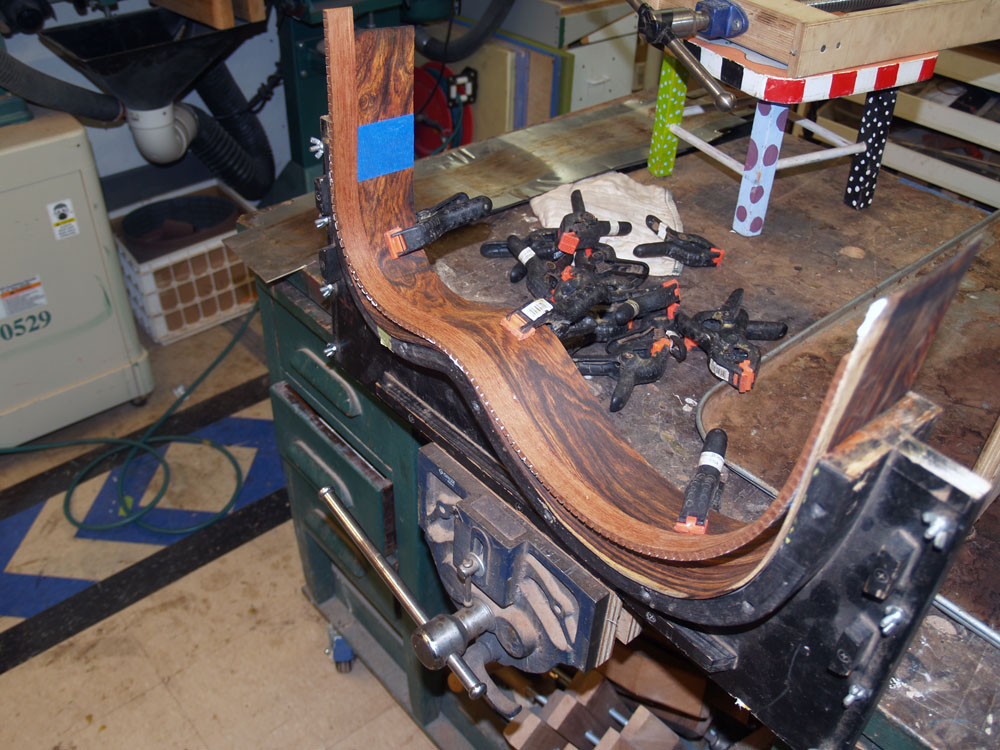
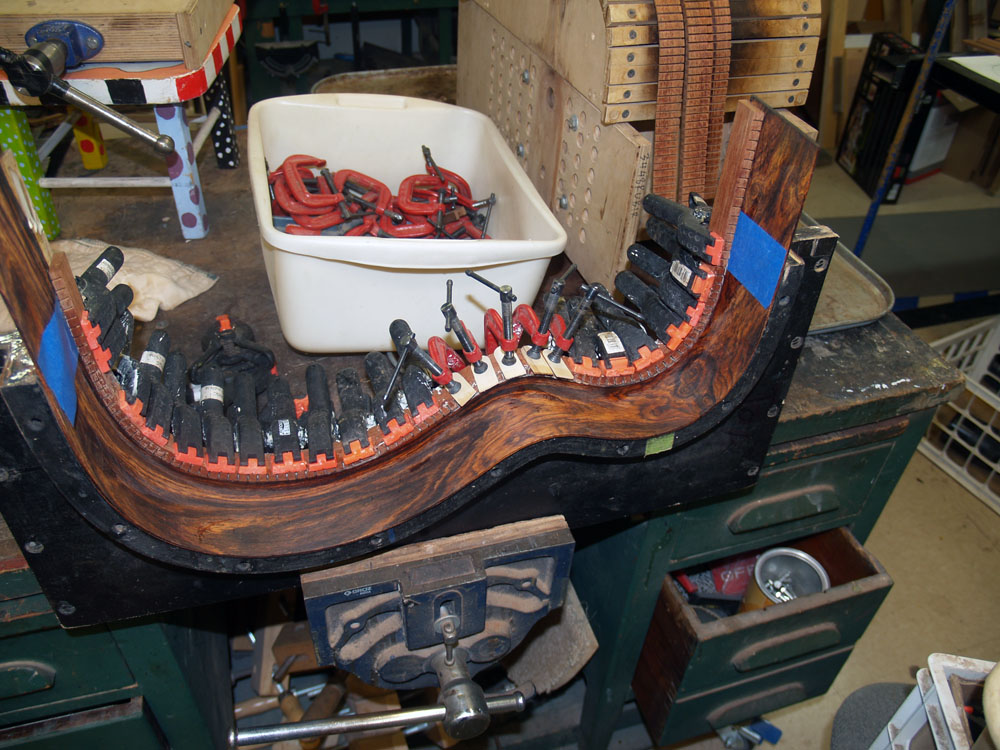
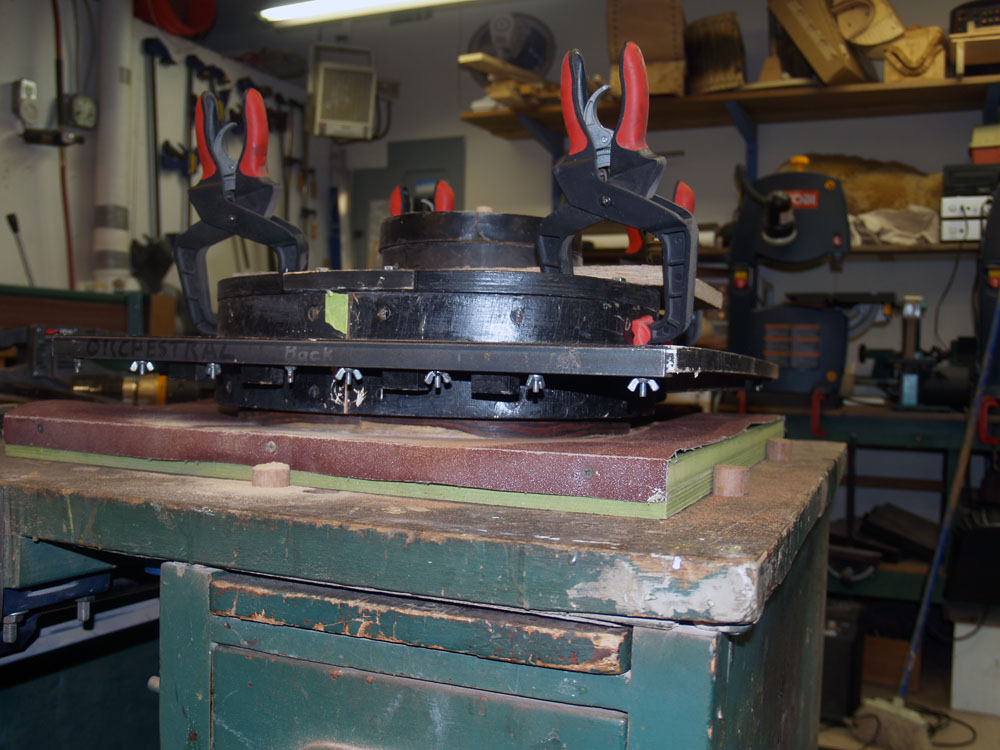
Here is where all of the clamps I have collected come into play. The form defines the shape of the sides. The clamps press the kerfing into side and then the side into the form.
 ( 54 ) 1-Feb-2013
Lota clamps. The set of C-clamps apply a bit of extra pressure at a critical spot.
 ( 55 ) 1-Feb-2013
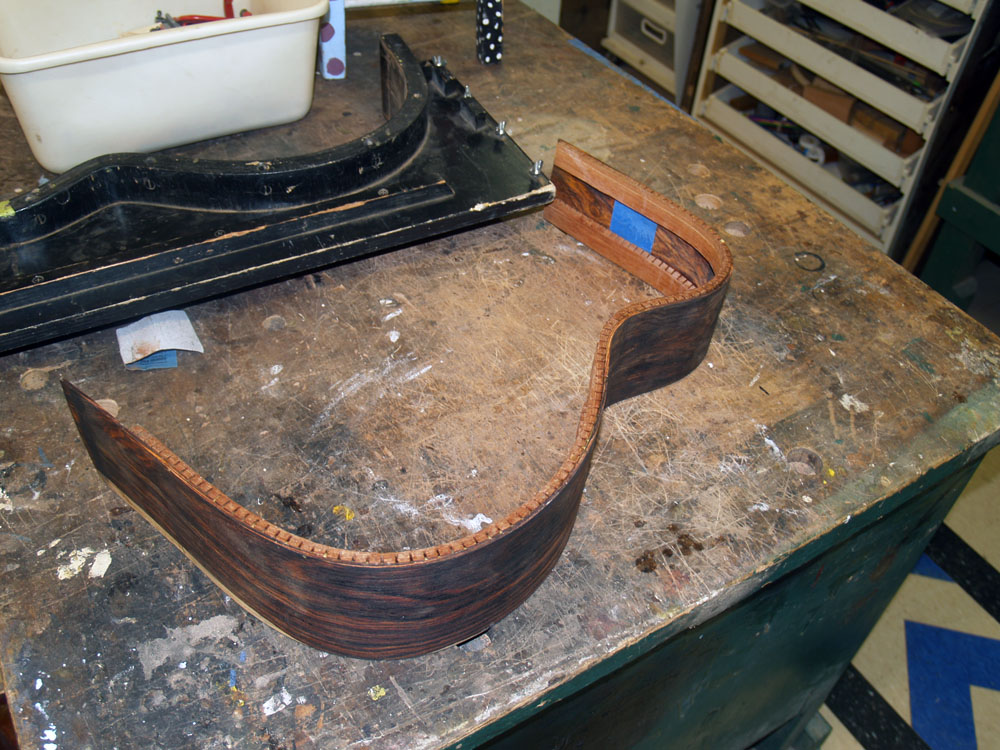
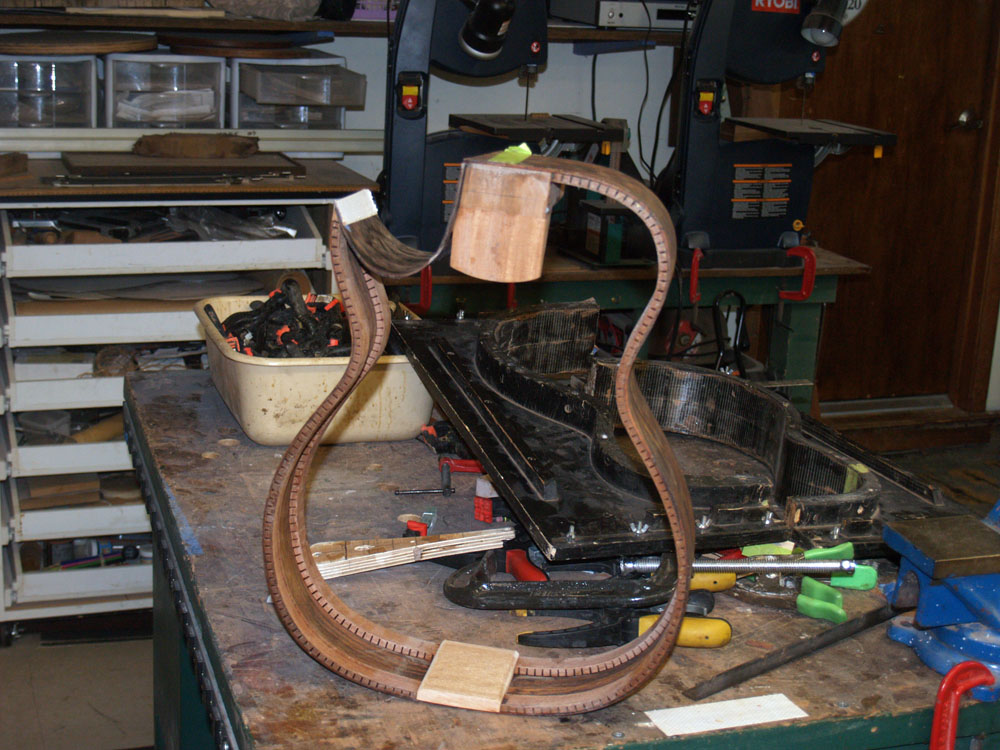
After the glue sets over night the side comes out of the form and it holds it shape.
 ( 56 ) 1-Feb-2013
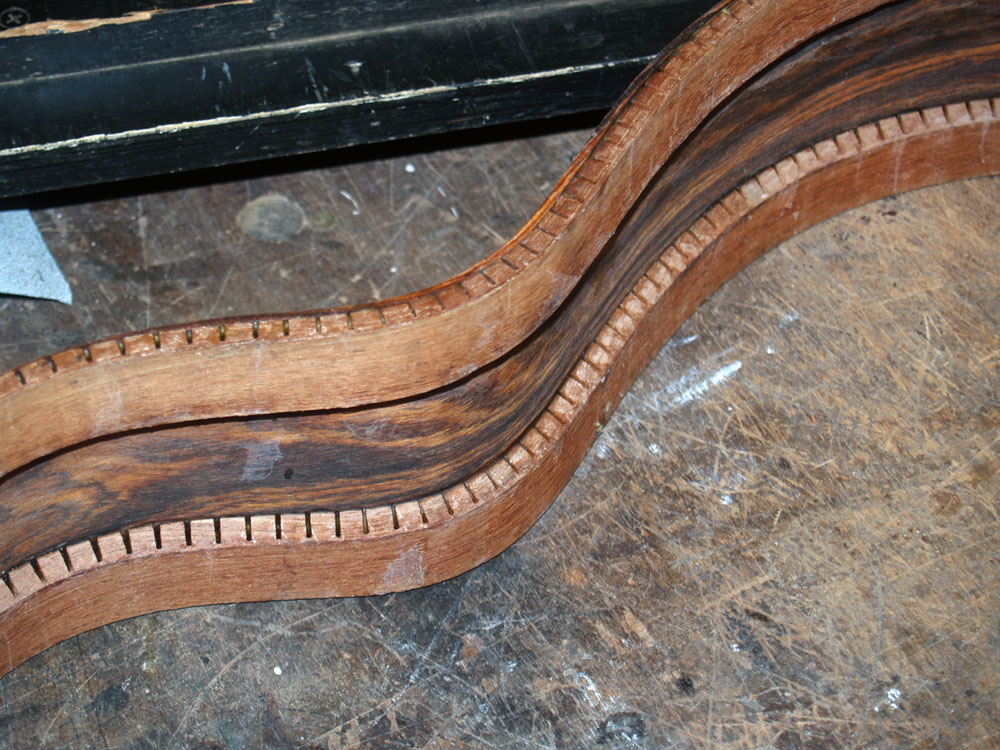
I use a reverse kerfing technique, where a solid strip of wood is held off the sides by about 1/4 inch, similar to a gunnel on a boat. This makes for a strong and stiff side.
 ( 57 ) 1-Feb-2013
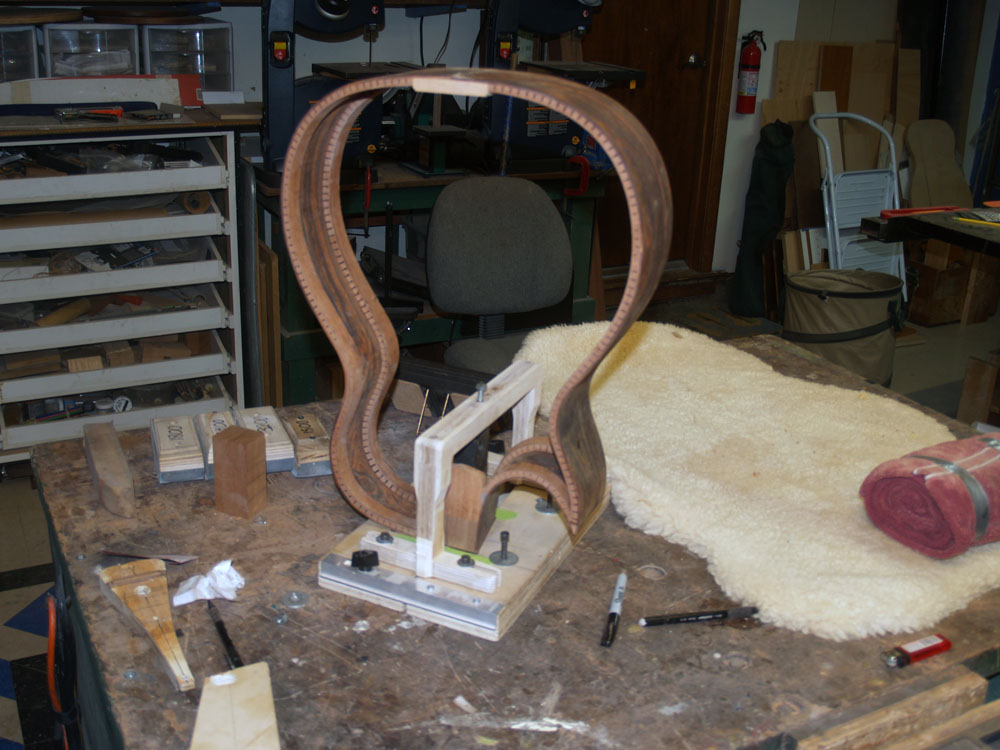
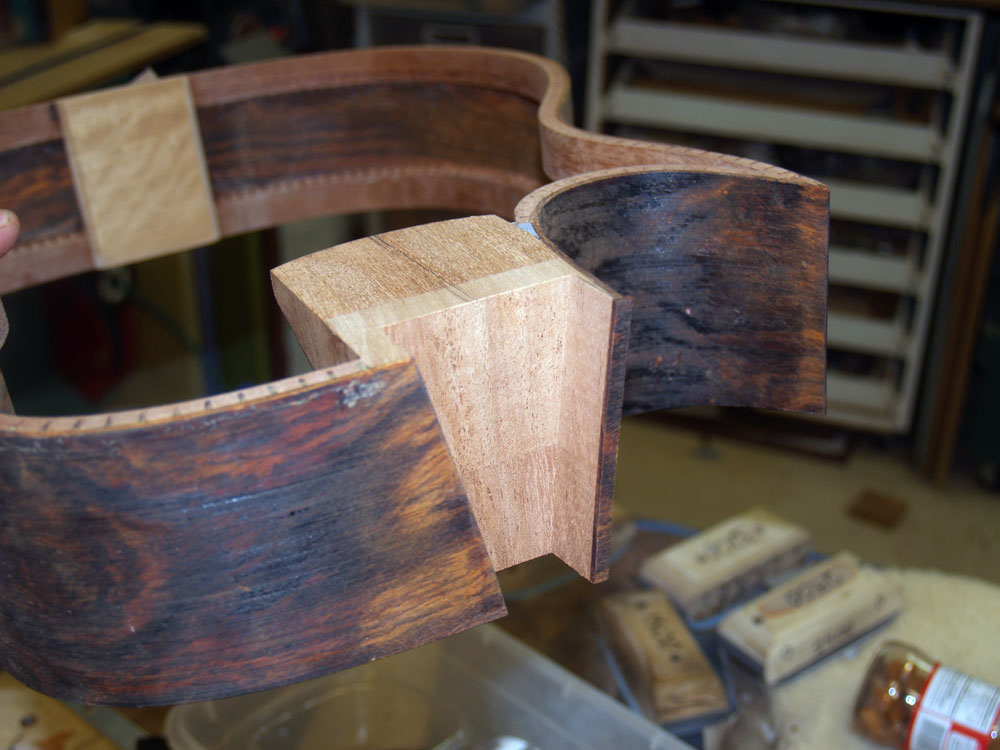
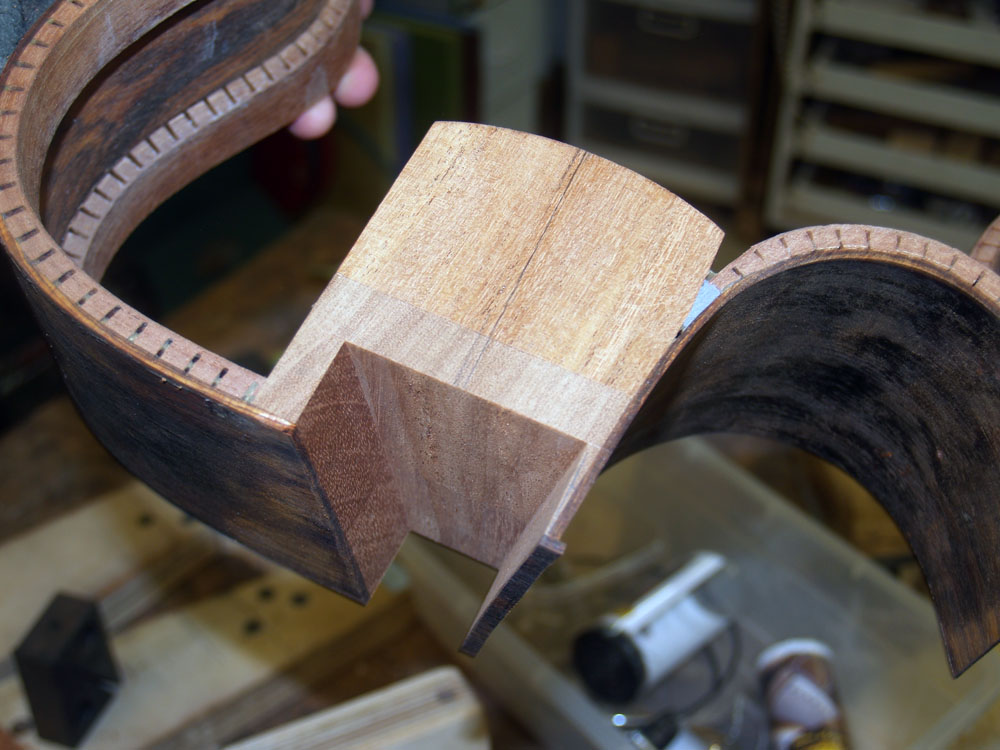
Now I turn my attention to making the heel block. This block will hold the two sides together and form the cutaway section.
 ( 58 ) 1-Feb-2013
A bit of hand work shapes the block.
 ( 59 ) 1-Feb-2013
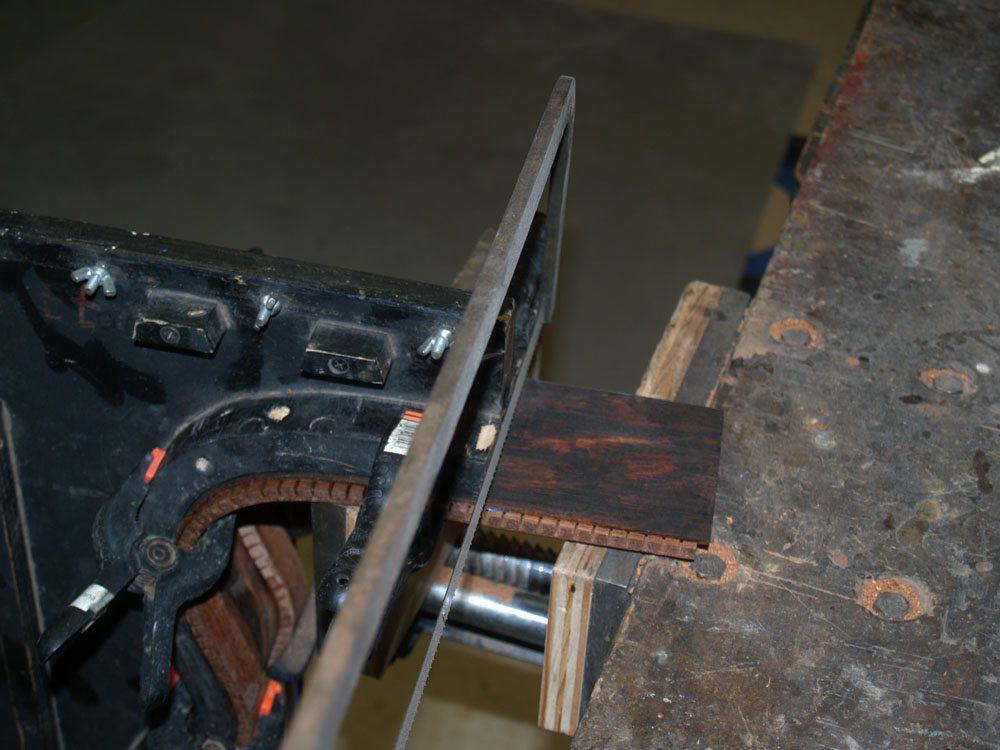
I next trim off the excess portion of the sides.
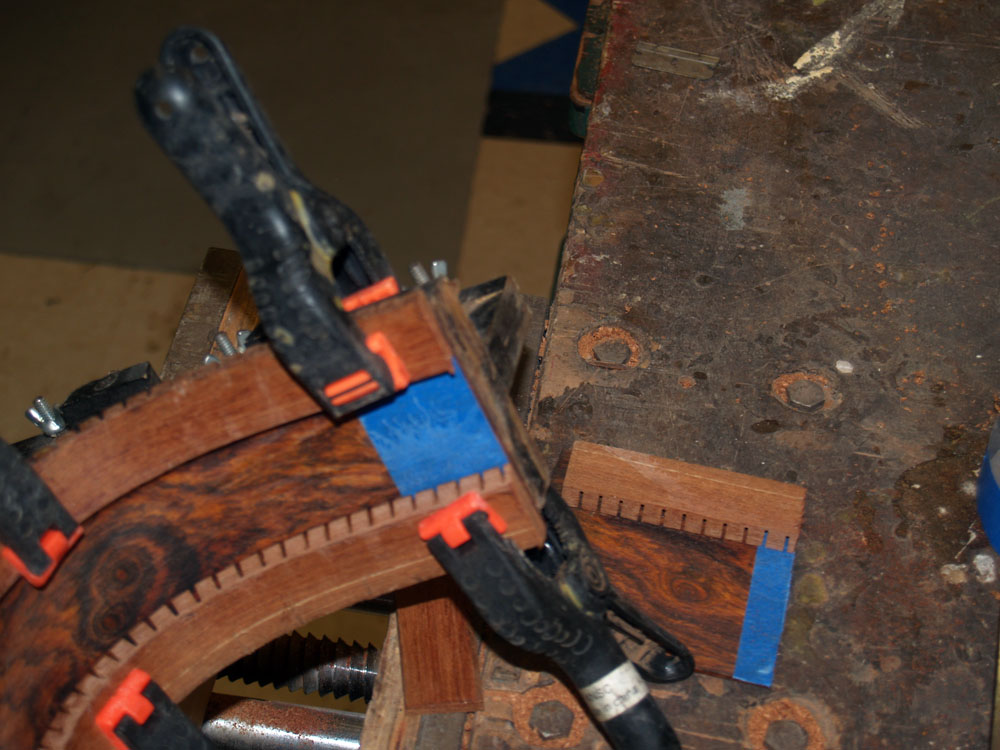 ( 60 ) 1-Feb-2013
The blue tape prevented the kerfing from being glued in the area where the heel block will be attached.
 ( 61 ) 1-Feb-2013
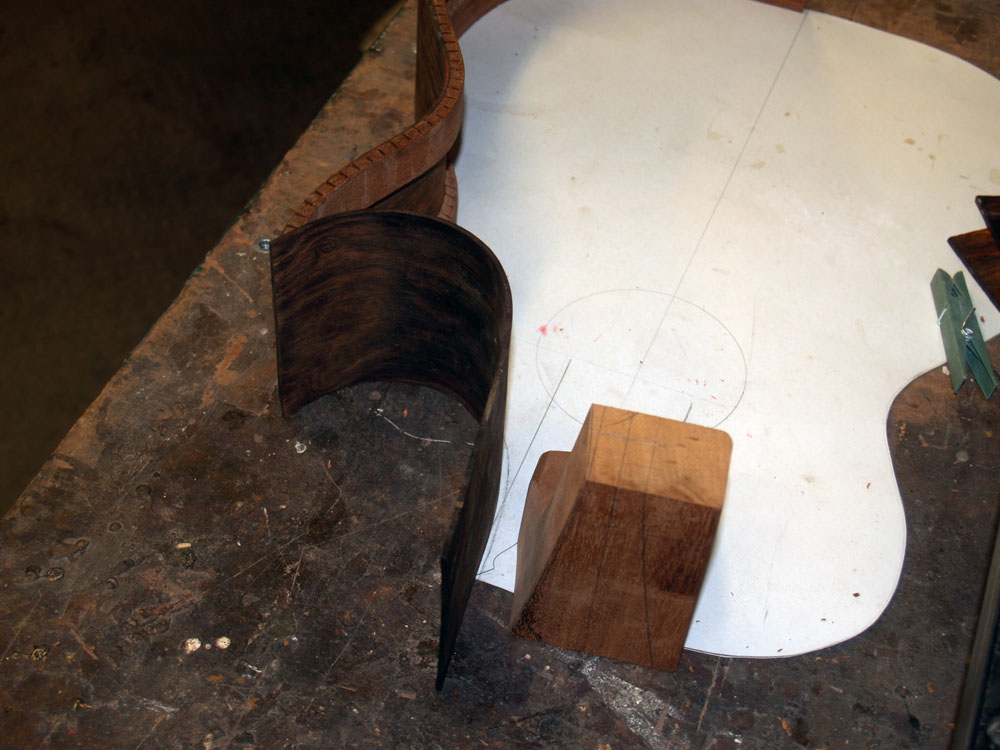
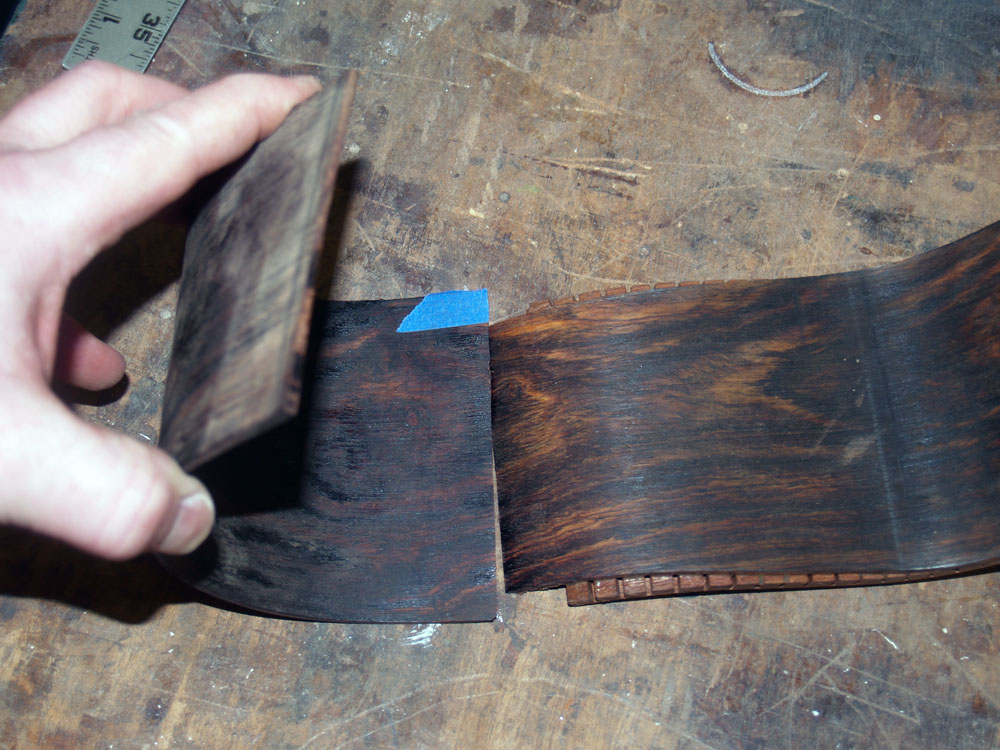
I lay out the cutaway pieces and contemplate my next steps.
 ( 62 ) 1-Feb-2013
I need to trim the cutaway piece so it fits just right. Here I am dry fitting the pieces together as I trim it until I am happy with the fit.
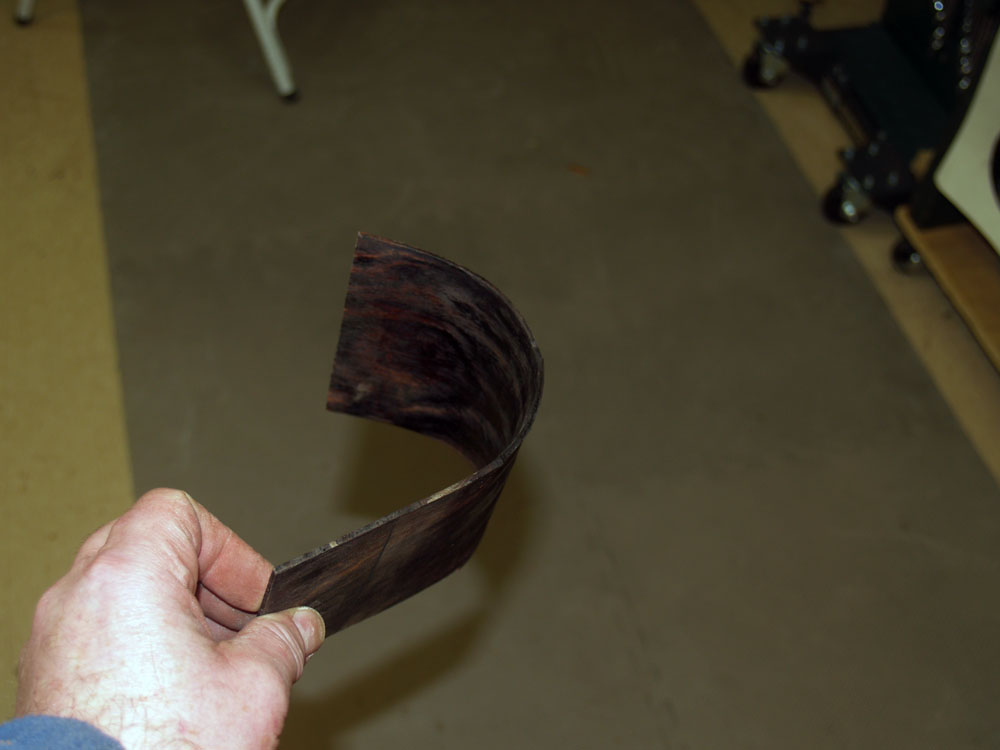 ( 63 ) 1-Feb-2013
Another funny shaped piece of wood.
 ( 64 ) 1-Feb-2013
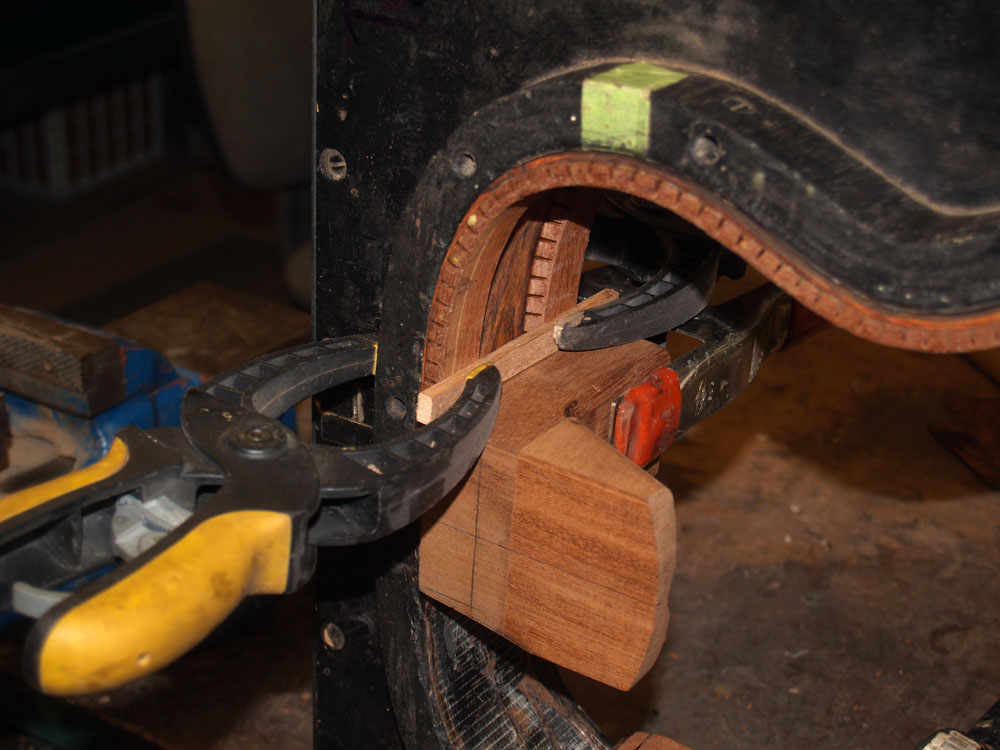
Here I am setting up the heel block to measure were I will remove the kerfing. The small piece of wood held by the clamps will guide the saw so I get a good fit.
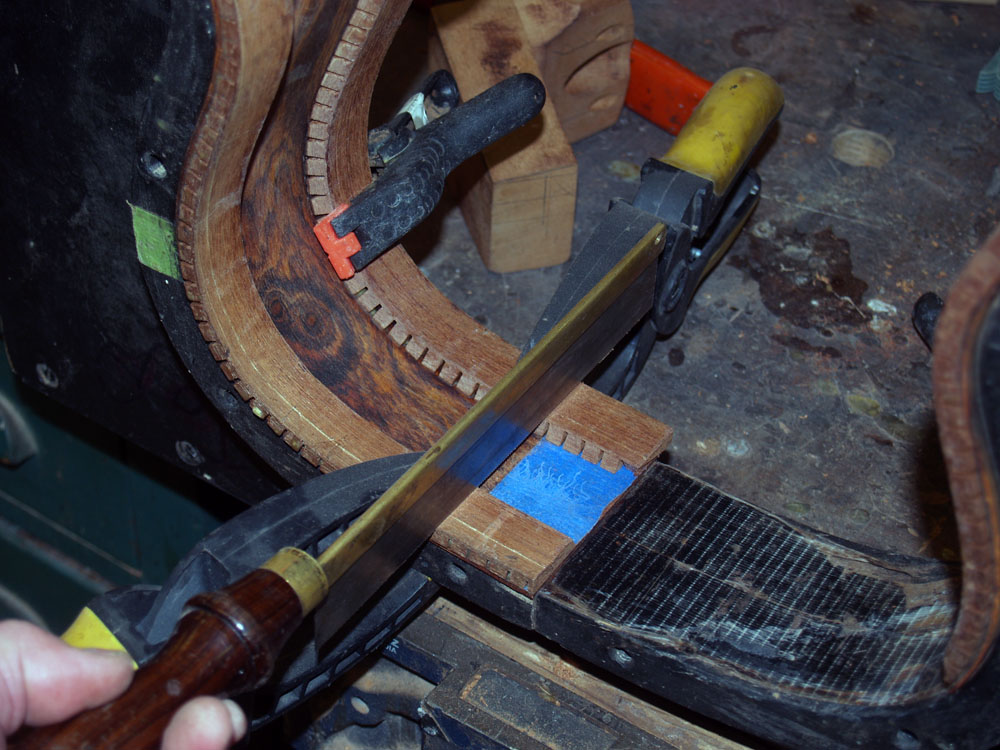 ( 65 ) 1-Feb-2013
A small hand saw is used toy cut away the kerfing.
 ( 66 ) 1-Feb-2013
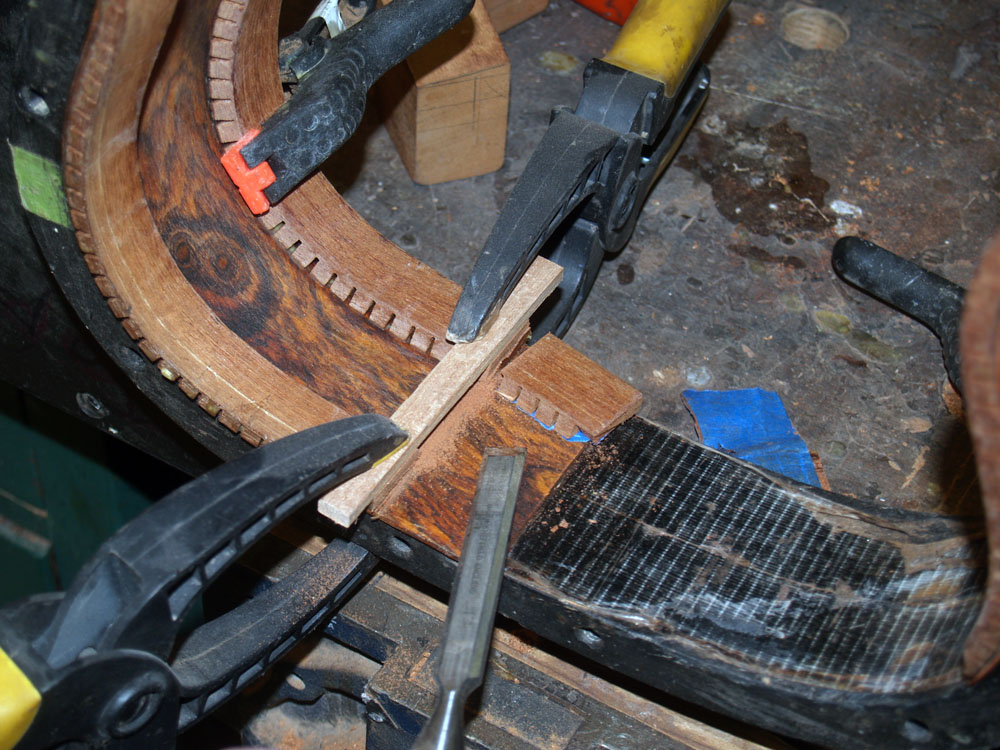
And a little chisel work to finish the job.
 ( 67 ) 1-Feb-2013
A perfect fit.
 ( 68 ) 1-Feb-2013
Here I am trimming the point of the cutaway so I get a nice bevel joint.
 ( 69 ) 1-Feb-2013
The two pieces of the cutaway side need to fit and match the grain.
 ( 70 ) 1-Feb-2013
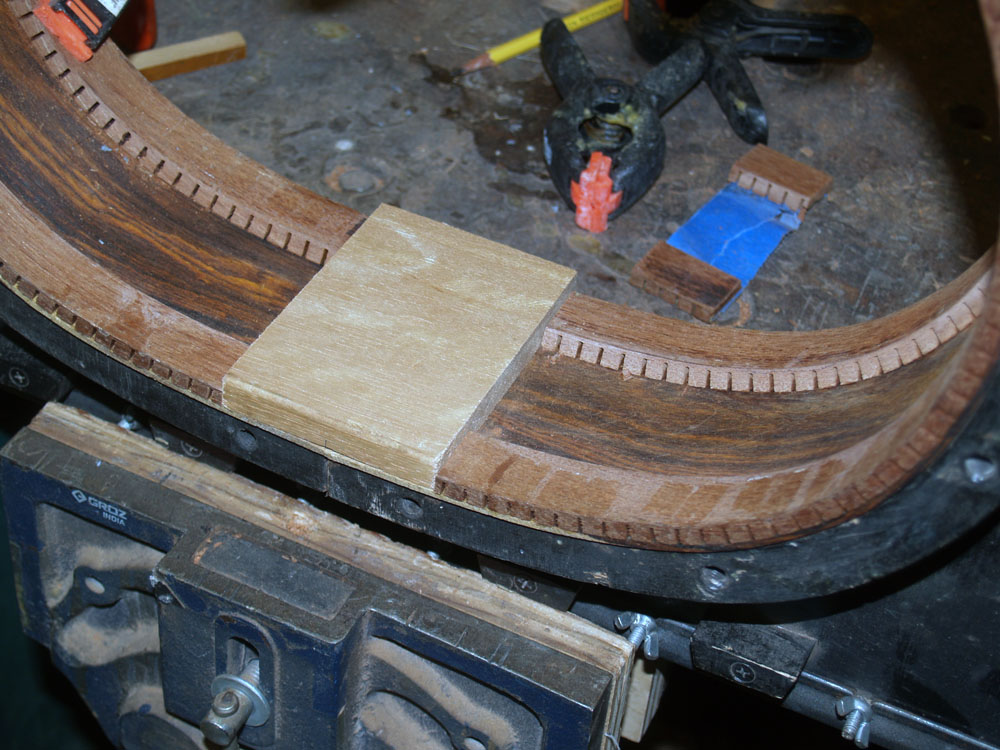
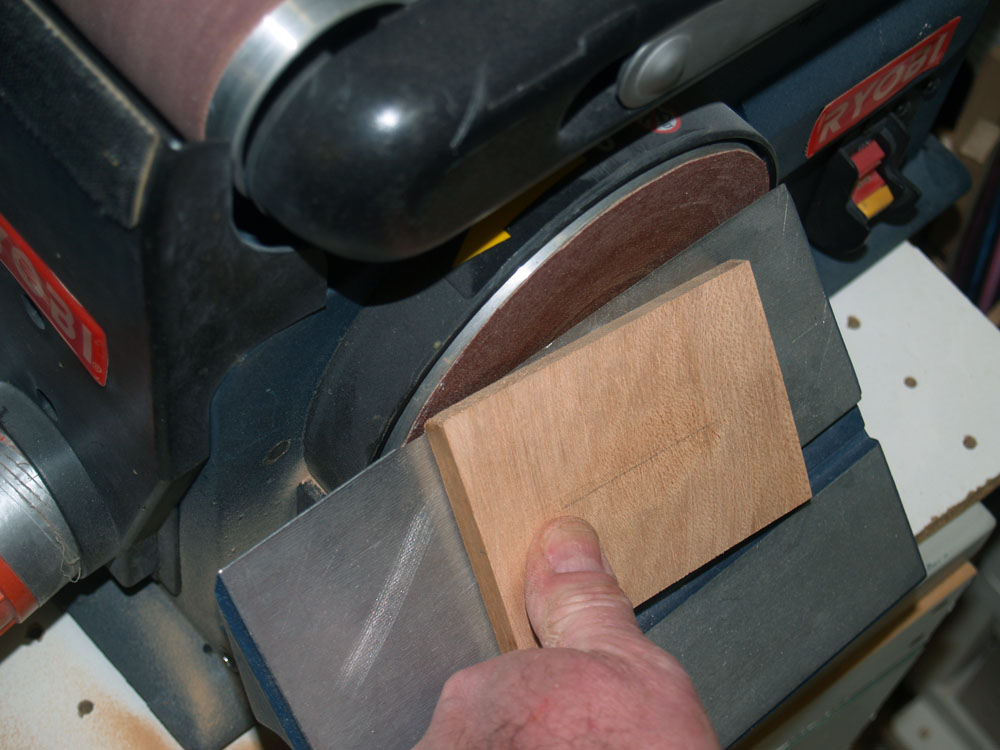
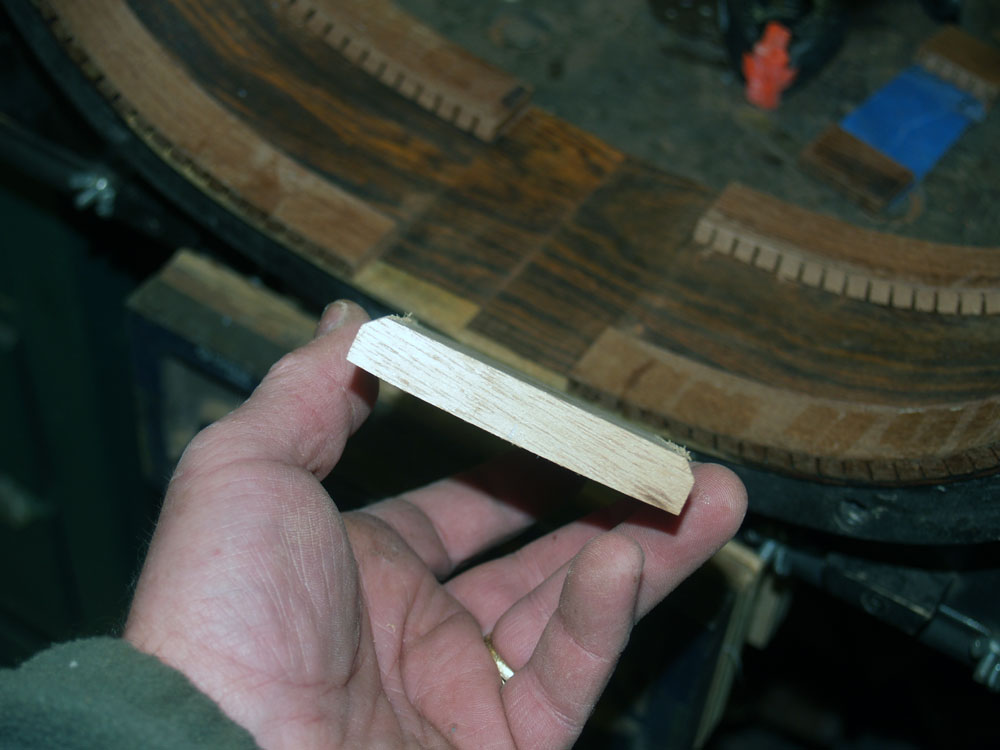
I use a small piece of mahogany to reinforce the joint. This piece needs to match the interior shape of the cutaway section to make a good joint.
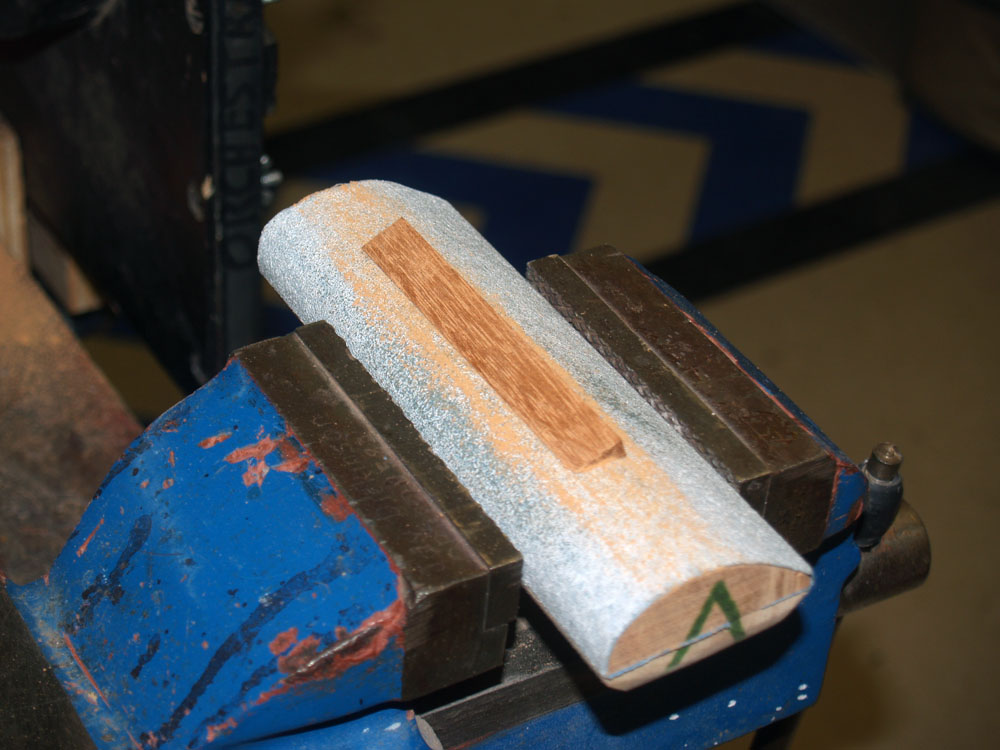 ( 71 ) 1-Feb-2013
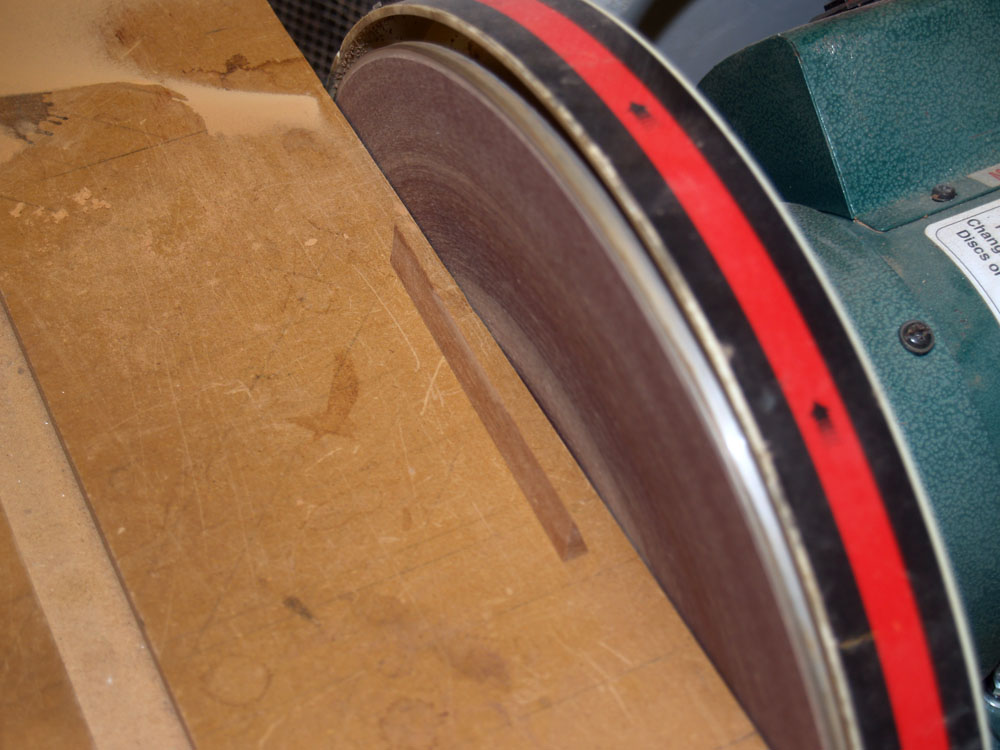
The wood has a gentle curve to it so a little hand sanding with this special sanding block is used.
 ( 72 ) 1-Feb-2013
The cutaway area get a liberal amount of glue.
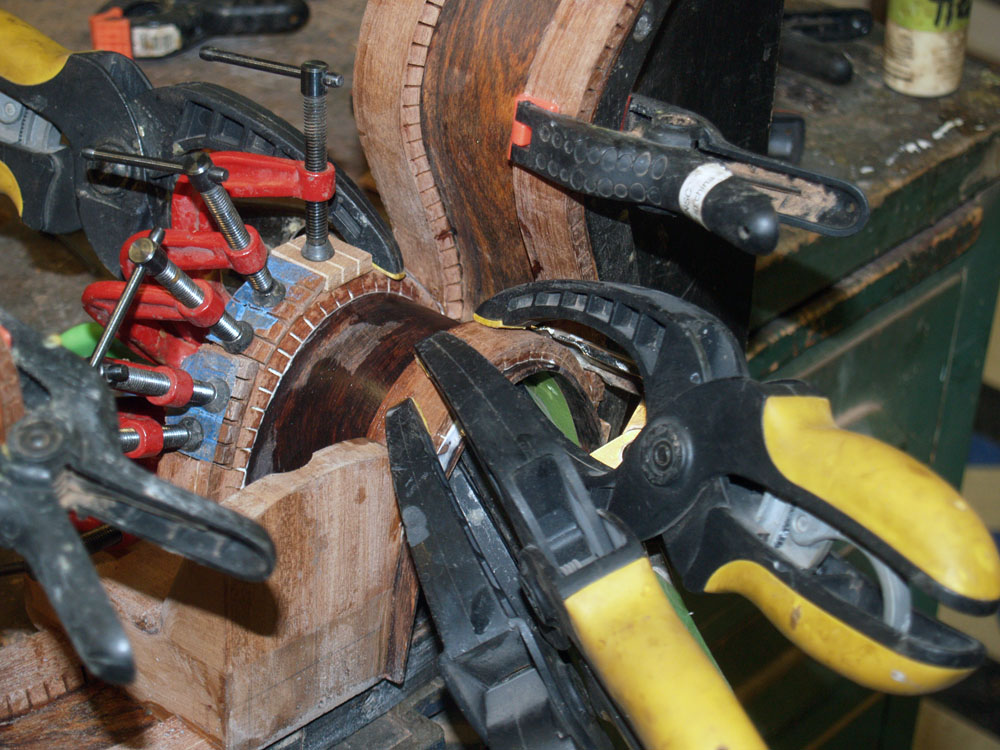
 ( 73 ) 1-Feb-2013
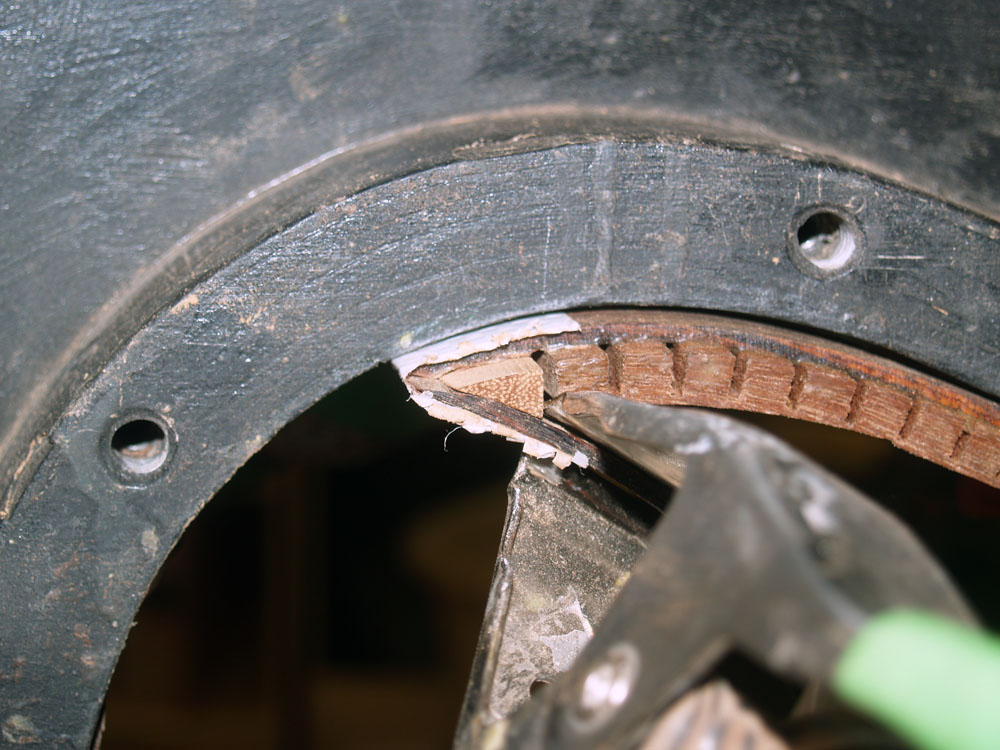
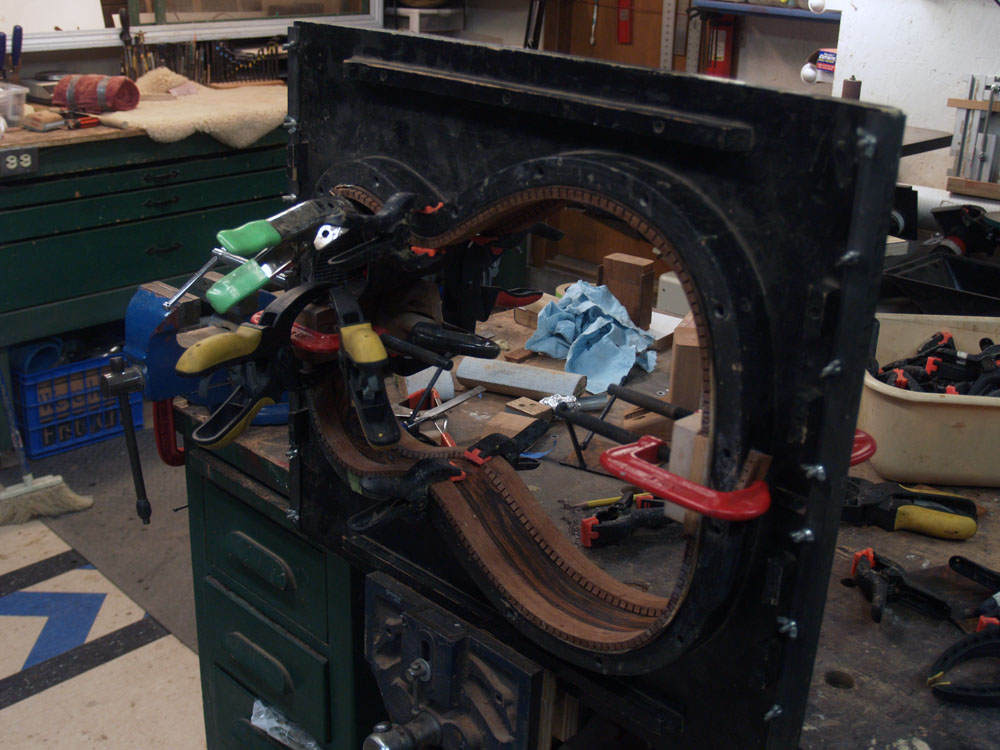
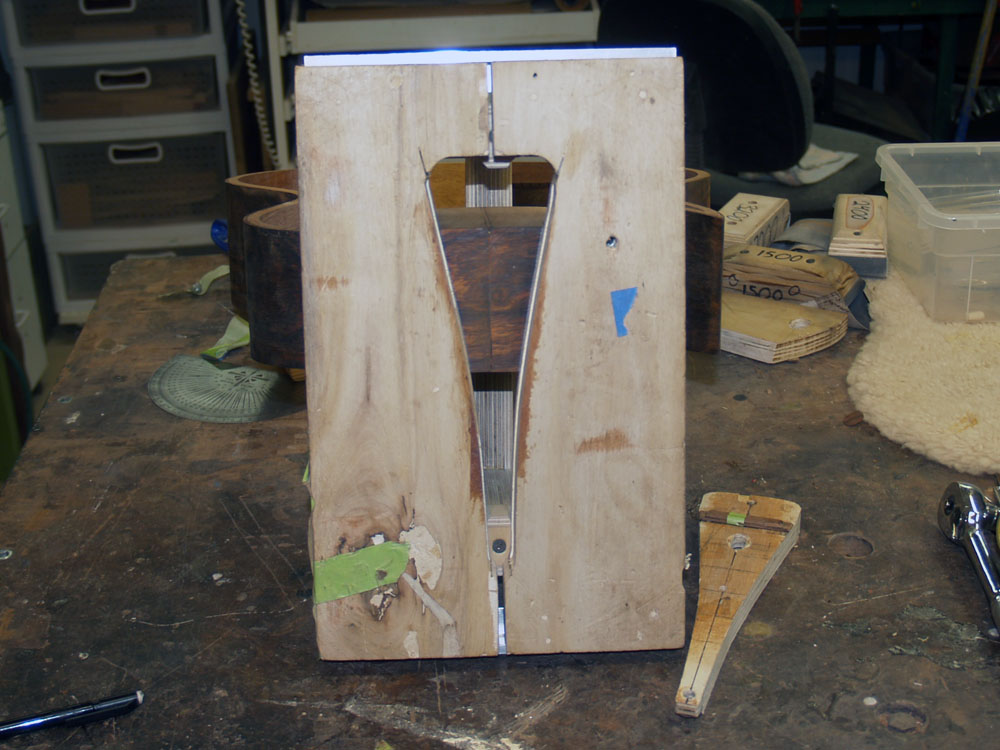
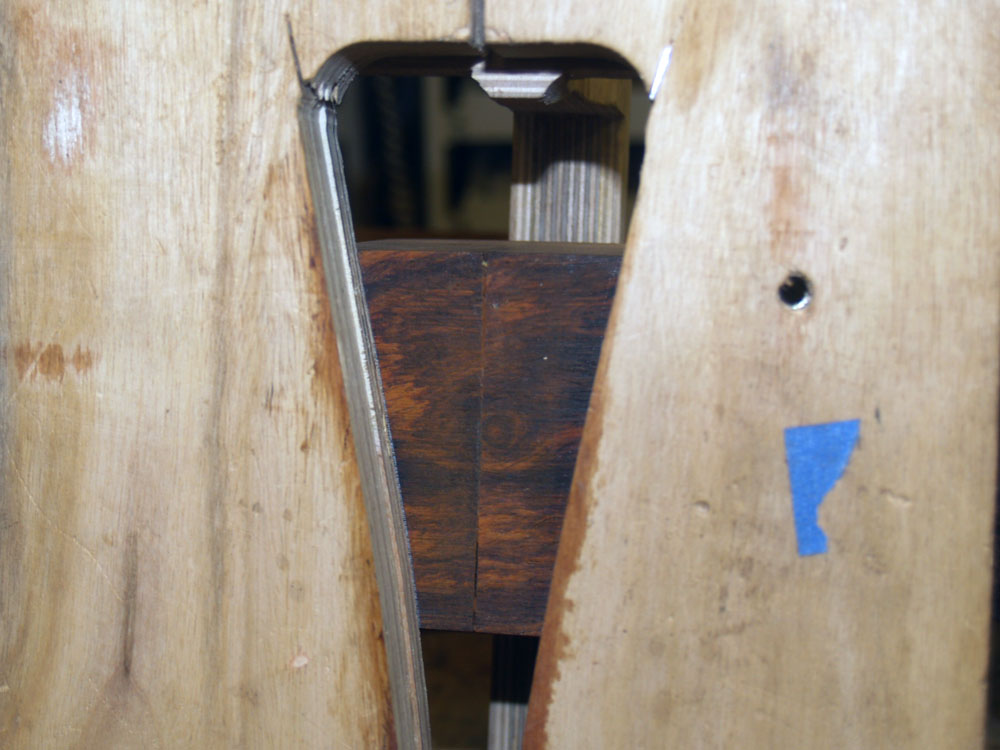
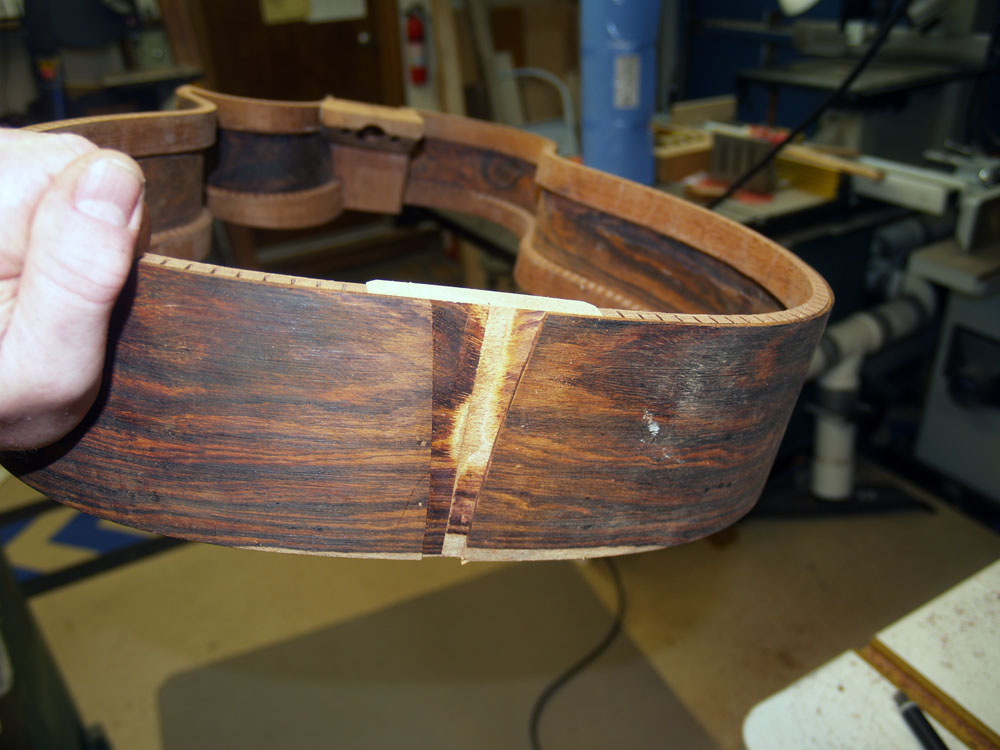
And here you can see the point of the cutaway as it is being glued together. Cocobolo is a very hard wood, and this point is so extreme that when I was sanding it after it had set I sliced my finger open, slightly. I rounded the point off a bit.
 ( 74 ) 1-Feb-2013
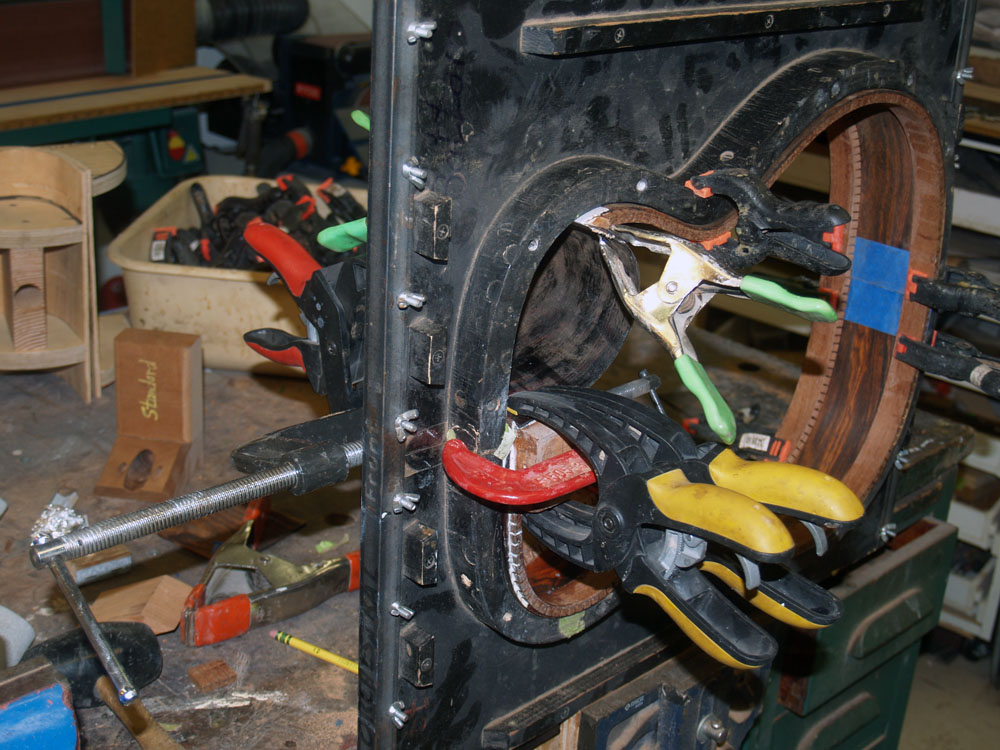
Here you can see the setup as I glue the heel block into place. I count 6 different types of clamps. I'm a sucker for a good clamp.
 ( 75 ) 1-Feb-2013
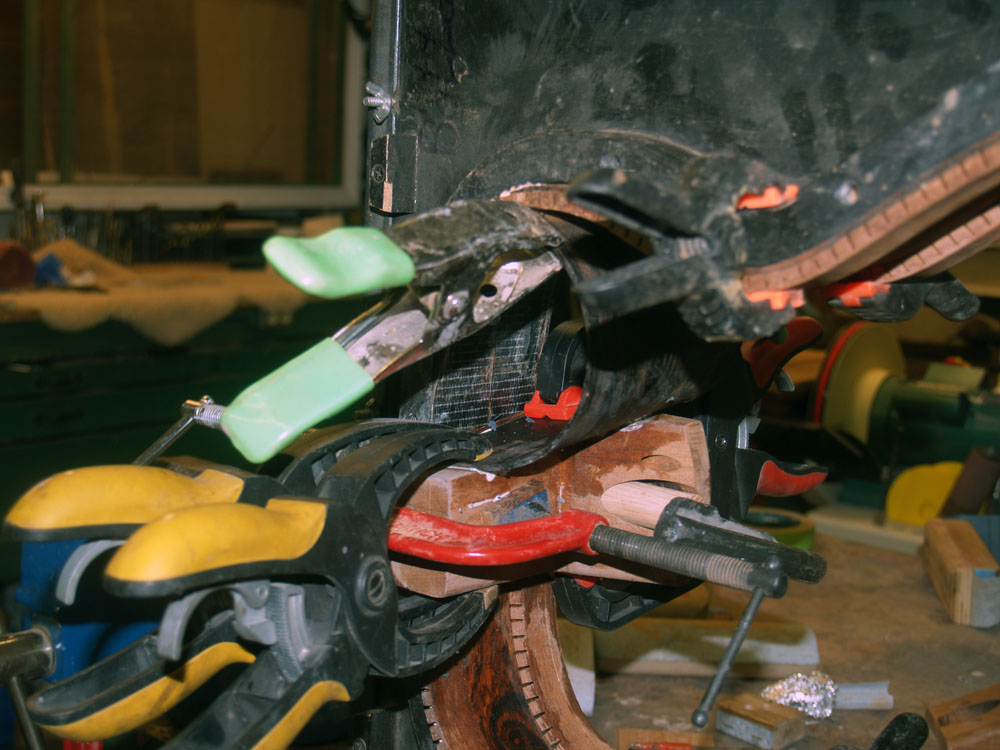
A little pressure in the right place.
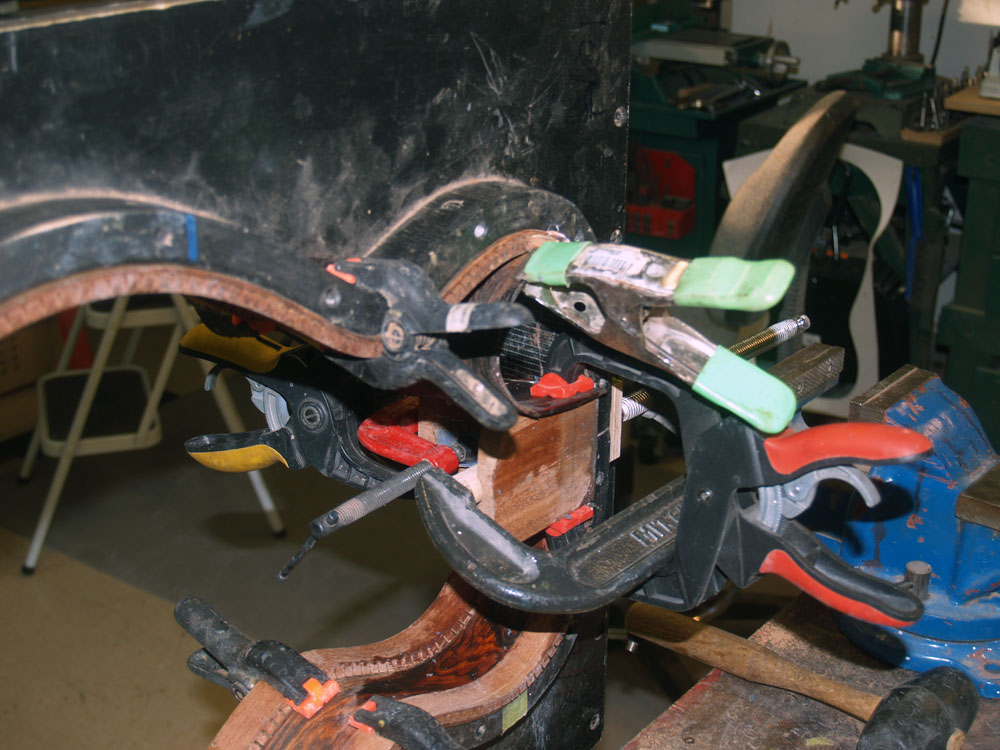 ( 76 ) 1-Feb-2013
From te other side.
 ( 77 ) 1-Feb-2013
It looks like a mess, but it will clean up quite nicely.
 ( 78 ) 1-Feb-2013
The tail block is positioned at the back of the sides.
 ( 79 ) 1-Feb-2013
I will use these strips of wood to guide the saw.
 ( 80 ) 1-Feb-2013
And after the kerfing is removed the block fits in perfectly.
 ( 81 ) 1-Feb-2013
The tail block needs to match the contour of sides. I use a special sanding fixture to get the shape right.
 ( 82 ) 1-Feb-2013
Here I am putting beveled edges on the tail block to make it look right.
 ( 83 ) 1-Feb-2013
 ( 84 ) 1-Feb-2013
A few more clamps press the tail block into place as the glue sets up.
 ( 85 ) 1-Feb-2013
Here are the sides in their form getting glued together.
 ( 86 ) 1-Feb-2013
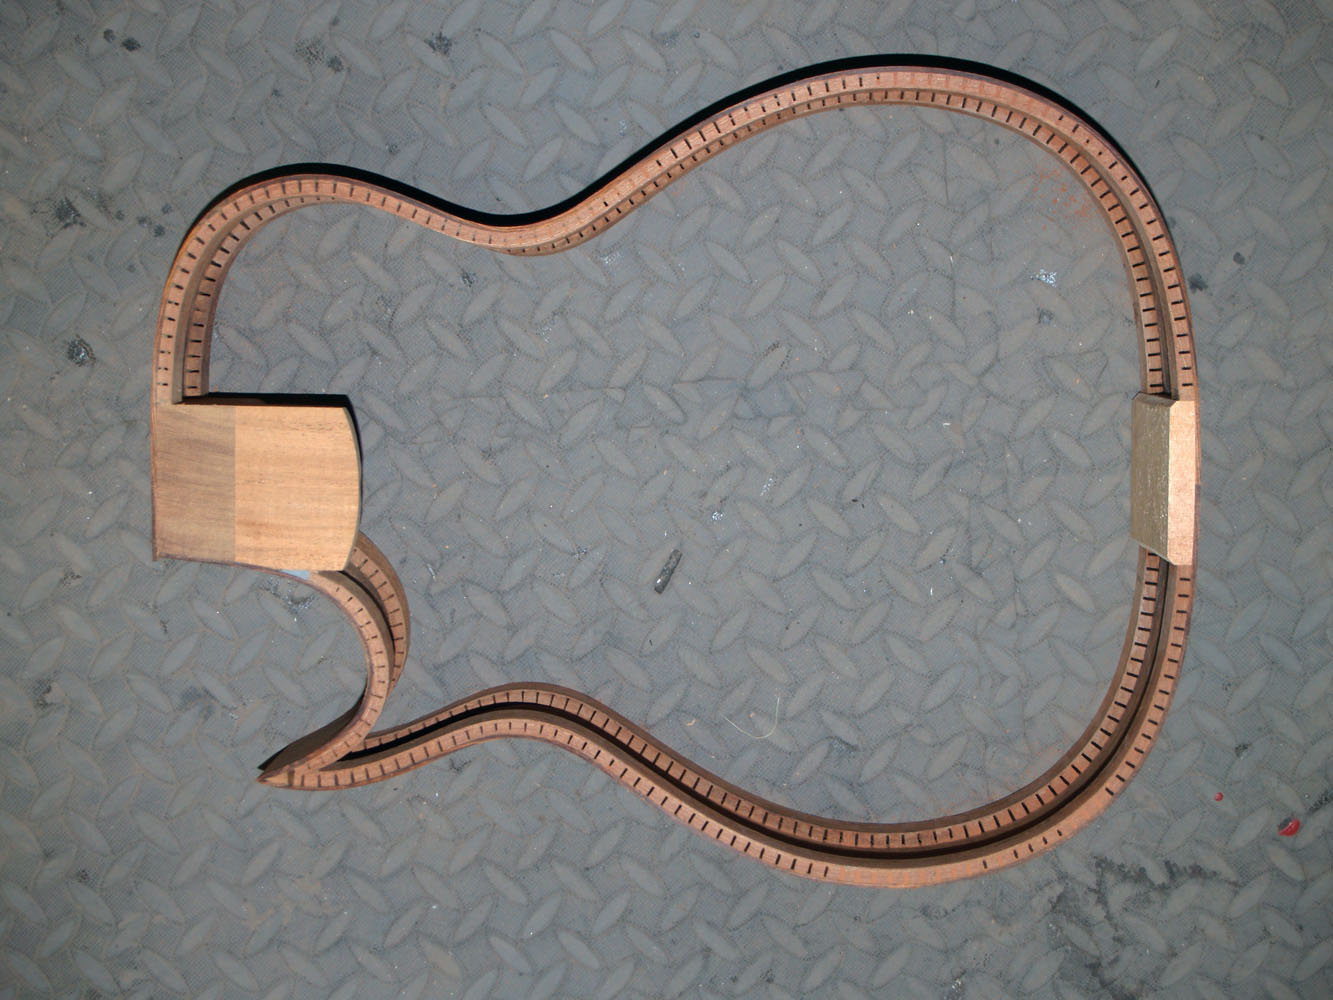
After the glue has set up over night I break the sides out of the form.
 ( 87 ) 1-Feb-2013
 ( 88 ) 1-Feb-2013
 ( 89 ) 1-Feb-2013
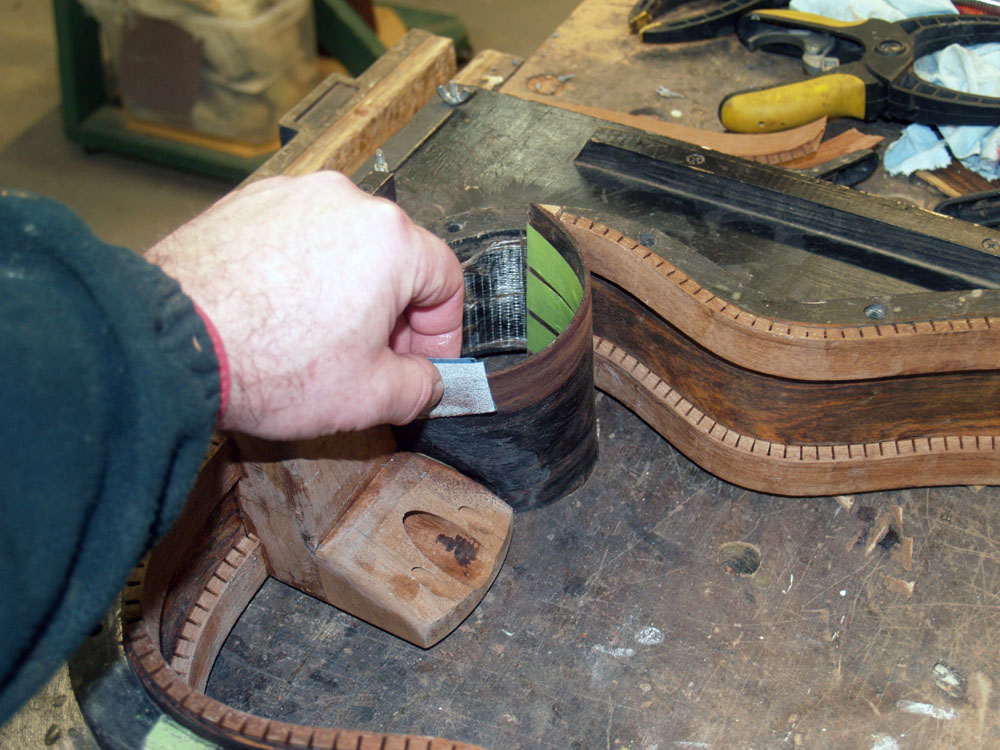
The cutaway section still needs to have the kerfing installed. Here I am cleaning up the inside surface so I can make a good glue joint. Cocobolo has a lot of natural oil so the surface must be properly prepared.
 ( 90 ) 1-Feb-2013
Here I am gluing the kerfing into place.
 ( 91 ) 1-Feb-2013
 ( 92 ) 1-Feb-2013
And when the clamps are removed.
 ( 93 ) 1-Feb-2013
 ( 94 ) 1-Feb-2013
The top and bottom edges of the sides are only roughly shaped when they come out of the form. Here I am using the belt sander to remove some of the excess.
 ( 95 ) 1-Feb-2013
And the deep throated bandsaw removes the excess from the bottom of the heel block.
 ( 96 ) 1-Feb-2013
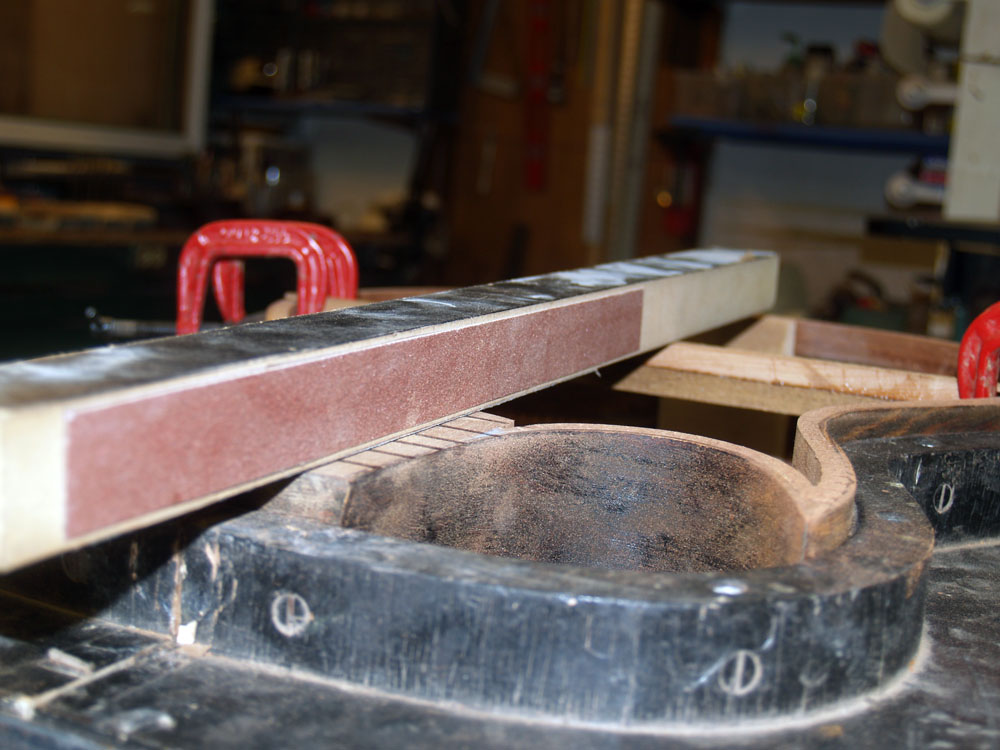
Now I turn my efforts to putting the final shape on the top and bottom edges of the rim. To do this I place a large piece of sandpaper on the sanding plate. These forms have the ultimate shape of the top and back and will be used to form the the braces and to build the top and back.
 ( 97 ) 1-Feb-2013
I put the sides back into their form with the edges standing proud, and then run the sides over the sanding plate with a few weights on top.
 ( 98 ) 1-Feb-2013
I use a marker on the edges to tell me where I am sanding and how far I have to go.
 ( 99 ) 1-Feb-2013
When all of the marker has been sanded away I know tat the edge of the sides have the same shape as the sanding plate. The top and back have different shapes and their own unique sanding plate.
 ( 100 ) 1-Feb-2013
In this picture I am fine tuning the projection of the top of the heel block. I want the top to have a straight line from the front of the guitar to the saddle.
 ( 101 ) 1-Feb-2013
I use a special spacer at the bridge point and a straight edge sanding block.
 ( 102 ) 1-Feb-2013
So, after a bit of work the top and back edge of the sides have the right shape.
 ( 103 ) 1-Feb-2013
A top view.
 ( 104 ) 1-Feb-2013
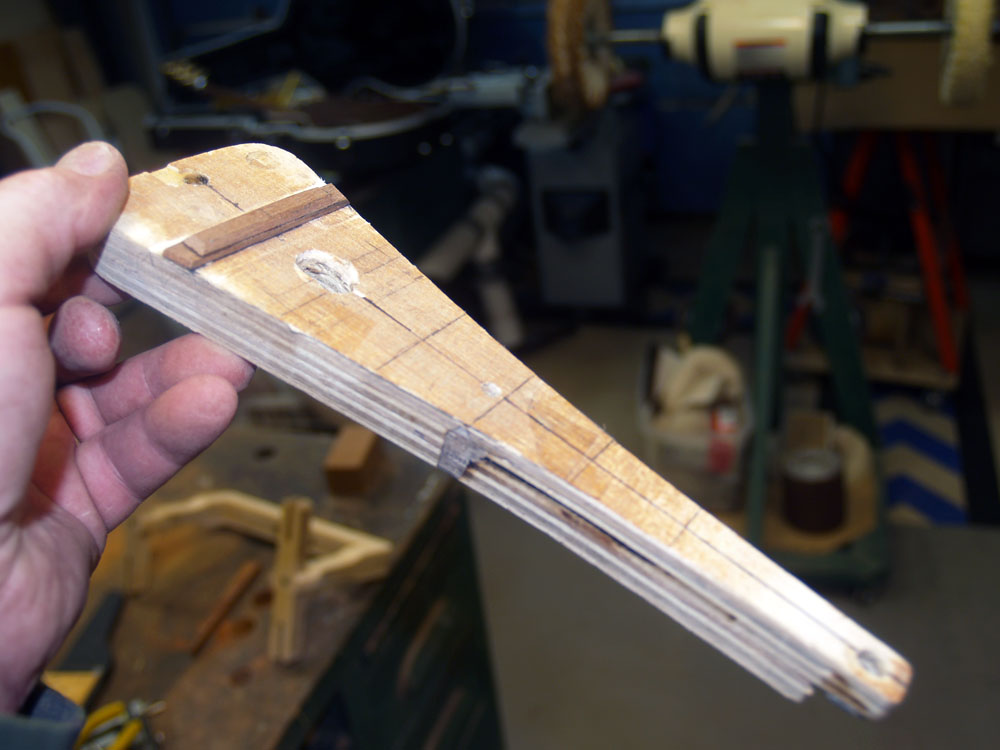
This template has the shape of the heel of the neck. I will use it to guide the routing out of the heel channel in the heel block, and to shape the heel of the neck.
 ( 105 ) 1-Feb-2013
To route the heel channel in the heel block I mount the rim on this special fixture.
 ( 106 ) 1-Feb-2013
The rim is held firmly in place by the cross beam and a compression bolt.
 ( 107 ) 1-Feb-2013
The bottom of the fixture shows a cutout with the same shape as the heel template.
 ( 108 ) 1-Feb-2013
This template has a lip on the inside to accommodate the routing guide.
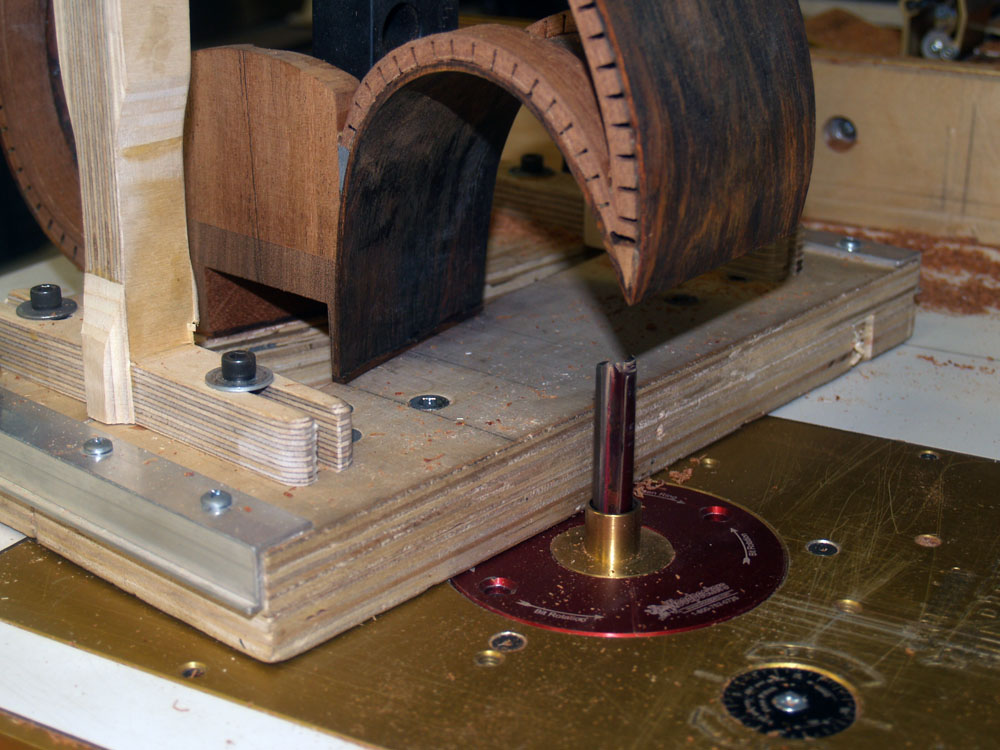 ( 109 ) 1-Feb-2013
Here you can see the router bit and its guide flange.
 ( 110 ) 1-Feb-2013
I run the router around the inside edge of the template and slowly raise the router bit until I have a channel that is 1 inch deep.
 ( 111 ) 1-Feb-2013
Here you can see the channel in the heel block before I remove the rim from the fixture.
 ( 112 ) 1-Feb-2013
And with the fixture removed.
 ( 113 ) 1-Feb-2013
This channel will house all of the attachment and adjustment hardware for the neck.
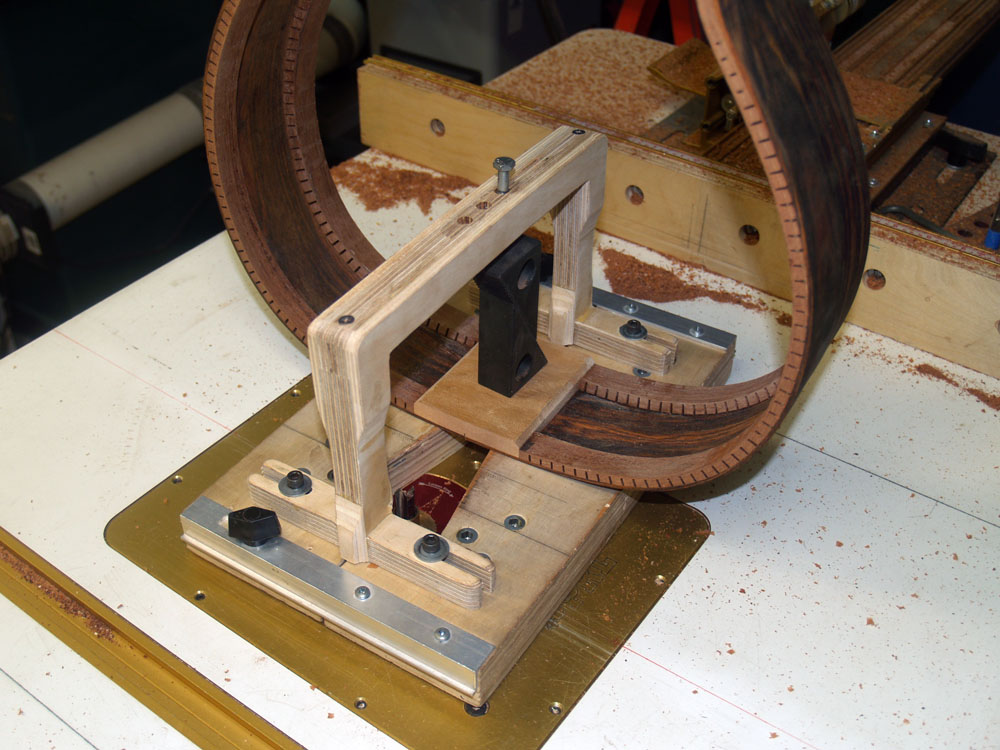 ( 114 ) 1-Feb-2013
The tail graft channel gets made in an identical fashion as the heel channel.
 ( 115 ) 1-Feb-2013
The tail graft channel is about 100 mils deep and will be filled with complimentary inlay.